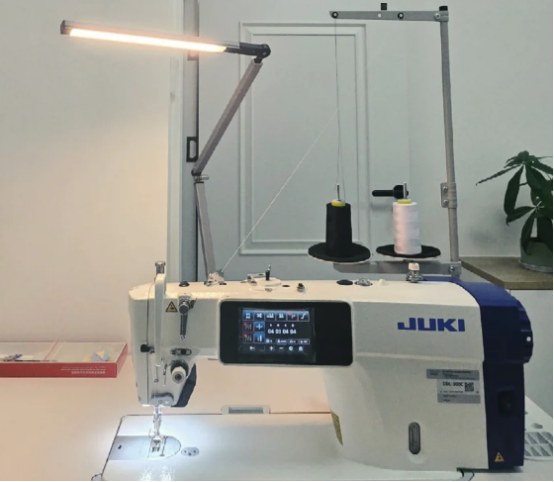
Whenever you are ready to sew clothes or fabrics with a JUKI industrial sewing machine, threading is particularly critical. Threading may seem simple, but it directly affects the sewing effect and efficiency. If the threading is not done correctly, problems such as thread skipping and thread breakage may occur, resulting in work interruption. But don’t worry, as long as you master the correct threading steps, you can make the JUKI sewing machine run smoothly and escort your sewing work. Next, I will present you with a complete threading step diagram for the JUKI industrial sewing machine.
Preparation before threading
Before you start threading, make sure the sewing machine is powered off to avoid accidents during operation. At the same time, prepare the required thread. It is recommended to choose a good quality sewing thread with appropriate thickness to suit the fabric you want to sew.
Specific threading steps diagram
- Bottom line
Industrial sewing machines JUKI usually have a special winding device. Place the empty bobbin on the winding shaft, and introduce the thread on the bobbin into the thread guide hole of the winding device, usually from right to left. Then, pass the thread around the tension disk of the winding device to adjust the winding tension of the bottom line so that the bottom line is wound evenly. After adjustment, step on the pedal of the sewing machine (the sewing machine should be offline at this time, that is, the needle bar and presser foot are not working), the winding shaft starts to rotate, and the thread is evenly wound on the bobbin. When the bobbin is full of thread, stop winding and remove the bobbin from the winding shaft.
- Upper thread
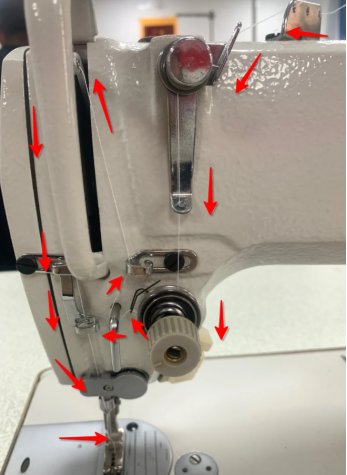
The upper thread needs to pass through multiple thread guide components on the sewing machine in sequence. First, pass the thread on the spool through the thread rack on the top of the sewing machine, and the thread passes through the hole of the thread rack, which serves as a preliminary thread guide. Next, the thread passes downward through the first thread guide hole on the machine body, which is usually located above the machine body near the thread rack. Then, pass the thread around the tension adjustment dial, which can control the tension of the upper thread. According to the thickness of the sewing fabric and the thickness of the thread, adjust the knob on the tension adjustment dial appropriately. Generally speaking, the thicker the fabric and the thicker the thread, the tension needs to be increased; otherwise, adjust it down. After adjustment, let the thread pass under the tension adjustment dial and pass through the second thread guide hole, which is usually near the bottom of the tension adjustment dial.
After that, the thread continues upwards and passes through the thread hole on the thread take-up lever. The thread take-up lever plays an important role in the sewing process, as it can tighten and loosen the upper thread at the right time. After passing through the thread take-up lever, the thread goes down through the third thread guide hole, which is usually located near the needle bar. Finally, the thread is passed into the needle hole from the left side of the needle and then pulled out from the right side, making sure that the thread is smooth in the needle hole without twisting or tangling.

Tips
- During the threading process, keep the thread clean and avoid knotting or tangling.
- The threading steps may differ slightly for different models of JUKI industrial sewing machines. If you encounter problems during threading, it is recommended to consult the instruction manual of the sewing machine.
Mastering the threading steps of the JUKI industrial sewing machine will make your sewing work smoother. I hope you can easily thread the needle when using the sewing machine and create satisfactory sewing works.