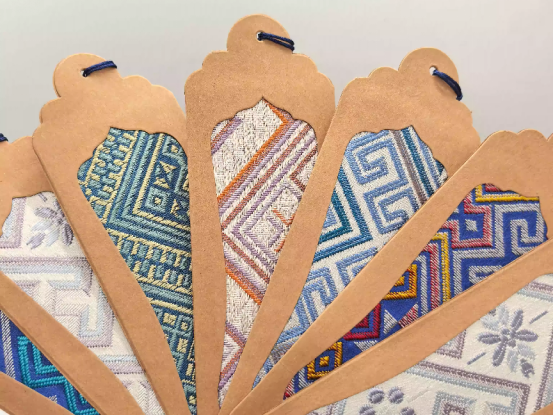
Introduction to the World of Fabric Handicrafts
Embarking on the journey of DIY fabric crafts opens up a boundless realm of creativity, allowing individuals to transform simple pieces of cloth into items of beauty, utility, and heartfelt expression. This comprehensive guide serves as your ultimate resource, delving deep into various fabric projects, from elegant everyday accessories to charming decorative pieces. Far from a mere summary, we will meticulously unpack each project, providing exhaustive detail on materials, operational steps, and nuanced techniques to ensure your success and expand your crafting repertoire.
The Joy of DIY Fabric Creations
There’s a unique satisfaction that comes from creating something with your own hands. Fabric handicrafts offer a tactile and rewarding experience, engaging your senses and providing a creative outlet. It’s an opportunity to personalize gifts, enhance your home decor, or simply enjoy a meditative and productive pastime. The process of selecting fabrics, cutting patterns, and seeing a project come to life is inherently fulfilling, fostering a sense of accomplishment and pride.
Benefits of Engaging in Sewing Projects
Beyond the sheer pleasure, engaging in sewing projects offers numerous benefits. It hones fine motor skills, improves hand-eye coordination, and enhances problem-solving abilities as you navigate patterns and potential challenges. Furthermore, it’s an excellent way to practice mindfulness, reducing stress and promoting mental well-being. Environmentally conscious crafters also appreciate the opportunity to upcycle fabric scraps and reduce waste, creating sustainable and unique items.
What You’ll Learn in This Guide
This pillar page is designed to be your go-to reference for mastering several popular fabric craft projects. We will cover:
- Crafting Exquisite Fabric Bookmarks: Adding a unique and personalized touch to your reading experience.
- Designing Elegant Fabric Bows: Versatile accessories perfect for hair, gifts, or decor.
- Sewing Adorable Little Fabric Bees: Bringing whimsical stuffed creatures to life.
- Creating Charming Fabric Rice Balls: Decorative and tactile ornaments with various uses.
- Producing Delightful Pure Cotton Pumpkins: Perfect seasonal decor for a cozy home.
Each section is brimming with detailed instructions, ensuring you gain a thorough understanding of the techniques involved, enabling you to confidently tackle these and future fabric projects.

Crafting Exquisite Fabric Bookmarks
Elevate your reading experience or offer a thoughtful, handmade gift by crafting personalized fabric bookmarks. These simple yet elegant accessories are functional and allow for endless customization, making each one a unique piece of art. This section provides an exhaustive guide to creating durable and beautiful fabric bookmarks, ensuring every step is clear and achievable.
Why Fabric Bookmarks? A Touch of Personal Elegance
In an increasingly digital world, the tactile pleasure of reading a physical book remains cherished. A fabric bookmark adds to this experience, offering a soft, visually appealing, and often personalized placeholder. Unlike paper bookmarks that can tear or get lost easily, fabric bookmarks are durable, washable, and can be designed to reflect individual tastes or the theme of a book. They also make excellent small gifts or party favors, showcasing your crafting skills and thoughtfulness.
Materials You’ll Need
Before beginning, gather all necessary components. The quality of your materials will significantly impact the final product’s appearance and longevity.
- Fabric Scraps: Choose two coordinating cotton or linen fabrics (approx. 3″ x 10″ each). Quilting cottons are ideal due to their stability and wide variety of patterns.
- Lightweight Fusible Interfacing: A piece slightly smaller than your fabric (e.g., 2.5″ x 9.5″). This adds structure and prevents fraying, making the bookmark more robust.
- Ribbon or Decorative Cord: A 6-8 inch piece for a decorative loop or tassel attachment. Satin, grosgrain, or even thin leather cord works well.
- Matching Thread: High-quality polyester or cotton thread that blends with or complements your chosen fabrics.
- Sewing Machine or Hand Sewing Needle: A sewing machine is faster, but this project is entirely feasible by hand.
- Basic Sewing Tools: Scissors, rotary cutter and mat (optional but recommended for precision), iron and ironing board, pins or fabric clips, ruler, turning tool (e.g., a chopstick or point turner).
Step-by-Step Production Guide
Follow these detailed steps to construct your fabric bookmark, focusing on precision for a professional finish.
Preparing Your Fabric and Interfacing
Begin by accurately cutting your fabric pieces. Lay one fabric piece right side up, then center the interfacing on the wrong side. Fuse the interfacing according to the manufacturer’s instructions, typically using a hot iron with steam. This step is crucial for giving the bookmark its crisp shape and preventing stretching during sewing. Trim any excess fabric around the interfacing for clean edges.
Sewing the Bookmark Base
Place your two main fabric pieces right sides together. If using a directional print, ensure they are aligned correctly. Pin around the edges, leaving a 2-inch opening along one long side. This opening will be used for turning the bookmark right side out. Using a 1/4 inch seam allowance, stitch around all four sides, carefully pivoting at the corners. Backstitch at the beginning and end of your seam to secure the stitches.
Turning and Topstitching for a Crisp Finish
Clip the corners of your bookmark close to the seam allowance, being careful not to cut through the stitches. This reduces bulk and helps create sharp corners when turned. Turn the bookmark right side out through the opening. Use a turning tool to gently push out the corners. Press the entire bookmark flat with an iron, ensuring the seam allowance at the opening is tucked neatly inside. Topstitch all around the perimeter of the bookmark, about 1/8 inch from the edge. This closes the opening and gives the bookmark a polished, professional appearance while adding durability.
Adding the Decorative Ribbon Element
Fold your ribbon in half to create a loop. Insert the raw ends of the ribbon into one end of the bookmark, between the two fabric layers, before you do the final topstitch. Ensure the loop is facing outwards. Stitch across this end of the bookmark a second time, specifically catching the ribbon ends securely within the seam. Alternatively, you can hand-stitch a ribbon loop or a decorative tassel to one end after the bookmark is fully constructed, allowing for more flexibility in design.
Tips for Customization and Durability
To make your bookmarks truly unique, consider adding embroidery, appliqué, or iron-on vinyl designs before sewing the pieces together. For increased durability, especially if the bookmark will see heavy use, you can use a heavier weight interfacing or even a thin layer of batting for a slightly padded feel. Always pre-wash your fabrics to prevent shrinking and ensure colorfastness before starting your project.

Designing Elegant Fabric Bows
Fabric bows are incredibly versatile, serving as charming hair accessories, delightful gift toppers, or elegant embellishments for clothing and home decor. This section provides a detailed tutorial for creating beautiful fabric bows, covering everything from material selection to the final attachment, allowing you to master various styles and sizes with ease.
Versatility of Fabric Bows: From Hair Accessories to Decor
The appeal of a fabric bow lies in its simplicity and adaptability. A small, delicate bow can adorn a child’s hair clip, while a larger, bolder bow can make a statement on a headband or a vintage dress. They are also perfect for adding a handmade touch to wrapped presents, enhancing the aesthetic of cushions, or even creating festive garlands. Understanding the basic construction allows for endless creative interpretations, making fabric bows a staple in any crafter’s toolkit.
Gathering Your Supplies
The materials required for fabric bows are minimal, making them an excellent project for using up fabric scraps.
- Fabric of Choice: Cotton, linen, satin, velvet, or even faux leather work well. The type of fabric will influence the bow’s stiffness and drape. You’ll generally need a strip about 3-4 inches wide and 12-18 inches long, plus a smaller piece for the center.
- Hair Clip, Brooch Pin, or Elastic Band: The base onto which your bow will be attached. Consider the intended use of the bow when selecting.
- Sewing Essentials: Hand sewing needle, matching thread, sharp scissors, iron and ironing board. A sewing machine is optional but can speed up the process for certain steps.
- Optional Embellishments: Beads, rhinestones, or small charms to add extra flair.
The Fabric Bow Tutorial
Follow these steps to construct a classic fabric bow. Variations in fabric type and dimensions will yield different results, encouraging experimentation.
Cutting and Shaping Your Fabric Strips
First, cut your main bow fabric. For a standard bow, cut a rectangle approximately 4 inches wide and 18 inches long. For the center wrap, cut a small rectangle about 2 inches wide and 4 inches long. If you want a stiffer bow, you can iron a piece of lightweight fusible interfacing onto the wrong side of your main bow fabric before cutting, similar to the bookmark process. Fold the main fabric strip in half lengthwise, right sides together, and stitch along the long raw edge and one short end, leaving the other short end open. Trim the seam allowance and clip the corner.
Forming the Basic Bow Loops
Turn the main fabric strip right side out through the open end. Press it flat with an iron, ensuring the seam is along one edge. Fold the raw open end inward and press to create a clean finish. Now, take this strip and form the basic bow shape: bring the two ends towards the center, overlapping slightly to create two loops. Pinch the center to gather the fabric, forming the classic bow “knot” area. You can secure this with a few hand stitches or a pin temporarily.
Creating the Center Knot or Wrap
Take your small center wrap fabric piece. Fold its long edges inwards towards the center, pressing firmly, then fold it in half again lengthwise to create a neat, narrow strip. Wrap this strip tightly around the gathered center of your bow. Overlap the ends at the back of the bow and hand-stitch them securely in place. This step gives the bow its defined center and hides the gathering stitches.
Attaching the Bow to Its Base
Once the bow is formed and the center wrap is secure, attach it to your chosen base. For a hair clip, apply a strong fabric glue or hand-stitch the back of the bow directly onto the flat part of the clip. For a brooch pin, stitch the pin backing onto the back of the bow. If using an elastic band, you can loop the elastic through the center wrap before securing it, or stitch the bow directly onto the elastic. Ensure all attachments are firm and neat for both aesthetics and durability.
Exploring Different Bow Styles and Sizes
Experiment with different fabric textures—satin for a luxurious feel, denim for a casual look, or patterned cotton for playful designs. Vary the dimensions of your fabric strips to create bows of different sizes, from tiny accent bows to large statement pieces. You can also create layered bows by stacking smaller bows on top of larger ones, or add tails by leaving the ends of the main fabric strip long instead of looping them. The possibilities are truly endless once you master the fundamental technique.

Sewing Adorable Little Fabric Bees
Bring a touch of whimsical charm into your home or create a delightful gift with adorable stuffed fabric bees. This project is perfect for using small fabric scraps and offers a rewarding experience in soft toy creation. This comprehensive guide will walk you through every step, from selecting materials to adding delicate details, ensuring your little bee buzzes with personality.
Bringing Whimsy to Life: The Charm of Stuffed Bees
Handmade stuffed animals possess a unique charm that mass-produced toys often lack. A fabric bee, with its iconic stripes and delicate wings, is a particularly endearing creation. These little plushies can serve as nursery decor, playful companions for children, or even unique pin cushions. The process of sewing a stuffed bee encourages attention to detail and offers a tangible reward for your efforts, resulting in a lovable, handcrafted item.
Materials for Your Buzzing Friend
Careful selection of materials will ensure your bee is both cute and durable.
- Yellow and Black Fabric Scraps: Cotton or flannel are excellent choices. You’ll need small pieces, roughly 6″x6″ of each color, depending on your desired bee size.
- White Felt or Fabric for Wings: A small piece (approx. 3″x3″) of white felt, organza, or sheer fabric for the wings.
- Stuffing Material: Polyester fiberfill is ideal for creating a soft, plump bee.
- Embroidery Floss for Eyes/Mouth: Black floss for eyes and a contrasting color for a smile (optional).
- Sewing Thread: Matching yellow and black thread for construction.
- Bee Pattern Template: You can draw a simple oval shape for the body or find free templates online.
- Basic Sewing Tools: Scissors, pins, hand sewing needle, fabric marker or chalk, turning tool.
Detailed Bee Construction Steps
Follow these meticulous instructions to construct your charming fabric bee, focusing on neatness and secure stitching.
Cutting Out the Pattern Pieces Accurately
Print or draw your bee body pattern onto paper. The body will typically be an oval shape. Cut two body pieces from yellow fabric and two from black fabric. You will also need two small wing shapes from white felt or fabric. Ensure your cuts are precise, as this will affect the symmetry of your finished bee. For striped bees, you can cut strips of yellow and black fabric and sew them together before cutting the body shape, creating a seamless stripe effect.
Assembling the Bee’s Body
Place one yellow body piece and one black body piece right sides together, aligning one curved edge that will form the stripe. Stitch along this curve with a 1/4 inch seam allowance. Repeat with the other yellow and black pieces. You should now have two striped body halves. Place these two halves right sides together, carefully aligning the seams of the stripes. Pin around the entire perimeter, leaving a 1.5 to 2-inch opening along one straight edge for turning and stuffing. Stitch around the bee’s body, backstitching at the start and end of your opening.
Stuffing and Closing the Seam
Clip the seam allowances around the curves to prevent puckering once turned. Turn the bee body right side out through the opening. Use a turning tool to gently push out all the curves. Begin stuffing the bee firmly with polyester fiberfill, ensuring all areas, especially the head and tail, are evenly filled. Avoid overstuffing, which can distort the shape, or understuffing, which makes the bee feel flimsy. Once adequately stuffed, use a ladder stitch (invisible stitch) to carefully close the opening, creating a smooth, seamless finish.
Adding Delicate Wings and Facial Features
Take your two wing pieces. You can either hand-stitch them directly onto the bee’s back or, for a more defined wing, sew two wing pieces right sides together, turn, stuff lightly, and then stitch to the bee. Position the wings symmetrically on the bee’s upper back. Using black embroidery floss, stitch small French knots or simple straight stitches for the eyes. For a mouth, a small curved backstitch can add a smile. These details bring your bee to life and allow for individual expression. Consider adding antennae using pipe cleaners or small pieces of black wire covered in fabric for extra detail.
Creative Variations: Stripes, Antennas, and Expressions
Experiment with different stripe patterns by cutting and sewing multiple narrow strips of yellow and black fabric. You can also vary the size of your bee by adjusting the pattern. For antennae, small beads on wire can be used, or you can embroider them directly onto the head. Play with different facial expressions by changing the shape of the eyes or mouth. Adding a tiny ribbon loop on top makes it a perfect ornament or keychain.

Creating Charming Fabric Rice Balls
Beyond their culinary namesake, fabric “rice balls” are delightful, weighted ornaments that offer a unique blend of decorative appeal and tactile satisfaction. These versatile creations can serve as decorative accents, paperweights, or even juggling balls for a whimsical touch. This section provides a clear, step-by-step guide to crafting these charming fabric weights, utilizing simple sewing techniques and readily available materials.
Beyond the Kitchen: Decorative Fabric “Rice Balls”
Fabric rice balls, or fabric weights, are a testament to the creativity found in simple forms. Their spherical or slightly flattened shape, combined with the pleasant weight of rice or other fillers, makes them satisfying to hold and visually appealing. They are an excellent way to repurpose fabric scraps, turning them into functional and decorative items that add a touch of handmade warmth to any space. Their simplicity makes them an ideal project for beginners, while experienced crafters can experiment with intricate fabrics and embellishments.
What You’ll Need for These Unique Ornaments
The beauty of fabric rice balls lies in their minimal material requirements, often utilizing items you already have on hand.
- Assorted Cotton Fabrics: Scraps of woven cotton fabric are perfect. Choose patterns and colors that appeal to you. You’ll need pieces large enough to cut circles or ovals (e.g., 6-8 inch diameter).
- Rice or Poly-pellets for Weight/Stuffing: Uncooked rice is the most common and economical filler. Poly-pellets offer a washable alternative and are often used in weighted blankets and toys. Sand or dried beans can also be used.
- Needle: A sturdy hand sewing needle capable of handling multiple layers of fabric and potentially thicker threads.
- Strong Thread: Upholstery thread or a double strand of regular sewing thread for gathering and securing the ball.
- Scissors: Sharp fabric scissors for clean cuts.
- Optional: Funnel for filling, fabric marker or chalk.
Simple Steps to Craft Fabric Rice Balls
The process of creating a fabric rice ball is surprisingly straightforward, relying primarily on a simple gathering technique.
Cutting Your Fabric Circles or Ovals
Begin by cutting a circle from your chosen fabric. A dinner plate or a large bowl can serve as a template for a perfect circle. The size of your circle will determine the final size of your rice ball. For a standard rice ball, a 6-8 inch diameter circle is a good starting point. If you want a slightly elongated or less perfectly round shape, you can cut an oval. Ensure your fabric is pressed flat before cutting for accuracy.
The Gathering Stitch Technique
Once your fabric circle is cut, thread your needle with a strong, long piece of thread (about 24-30 inches). Tie a knot at one end. Starting from the wrong side of the fabric near the edge, make a running stitch (in-and-out stitch) all the way around the perimeter of the fabric circle, about 1/4 to 1/2 inch from the raw edge. Ensure your stitches are even in length. Do not cut the thread once you’ve gone all the way around; leave a long tail on both ends of the thread.
Filling and Shaping Your Rice Ball
Once the running stitch is complete, gently pull both ends of the thread to start gathering the fabric. This will cause the fabric to cup inwards, forming a pouch. Begin filling this pouch with your chosen filler (rice, poly-pellets, etc.). A funnel can be very helpful here to prevent spills. Fill the pouch to your desired firmness and shape, leaving enough room to securely close the opening. As you fill, continue to gently pull the gathering stitches to form the spherical shape.
Securely Closing the Opening
Once filled, pull the gathering threads as tightly as possible to close the opening completely. The goal is to create a small, neat gather at the top. Secure the opening by tying off the threads with several strong knots. For extra security and a more finished look, you can then stitch across the gathered opening multiple times, catching all the fabric edges to prevent any filler from escaping. You can also hide the knot by pushing the needle through the ball and out another side, then snipping the thread close to the fabric.
Display Ideas and Practical Uses
Fabric rice balls are wonderfully versatile. Use them as decorative accents in bowls or on shelves, especially those made from coordinating holiday fabrics. They make excellent paperweights for your desk or sewing table, keeping patterns from blowing away. For children, brightly colored rice balls can be used for gentle indoor tossing games or as sensory toys. Consider adding a drop of essential oil to the rice before filling for a subtle, long-lasting aroma, turning them into decorative potpourri balls.

Producing Delightful Pure Cotton Pumpkins
Embrace the cozy spirit of autumn by crafting your own delightful pure cotton pumpkins. These charming fabric decorations are perfect for seasonal displays, adding a rustic yet elegant touch to your home decor. This detailed guide will take you through every step of creating various sizes of fabric pumpkins, from selecting the ideal cotton fabric to adding realistic indentations and a natural stem.
Seasonal Decor with a Handmade Touch: Fabric Pumpkins
Handmade fabric pumpkins offer a warm, inviting alternative to traditional seasonal decor. They are soft, unbreakable, and can be customized in an array of colors and patterns to match any interior design aesthetic, from farmhouse chic to modern minimalist. Crafting these pumpkins is a joyful project that allows for creative expression and results in beautiful, lasting decorations that can be brought out year after year. They are also fantastic for using up fabric scraps and for those who enjoy a tactile crafting experience.
Supplies for Your Autumnal Creations
Gathering the right materials is the first step to creating beautiful fabric pumpkins. The quality of your fabric will significantly impact the final look.
- Pure Cotton Fabric: Choose medium-weight cotton in autumnal colors (orange, cream, deep red, plaid, gingham, or even subtle neutrals). You’ll need a square or rectangular piece large enough to cut a circle (e.g., 10-20 inches per side, depending on desired pumpkin size).
- Polyester Fiberfill for Stuffing: Ensures a soft, plump, and lightweight pumpkin.
-
Sewing workspace note: This guide is educational craft information for general readers. Needles, blades, hot irons, steam, motors, cords, dyes, adhesives, and heavy equipment can create safety risks. Follow manufacturer instructions, test materials first, and consult qualified repair or safety professionals when tools or machines behave unexpectedly.