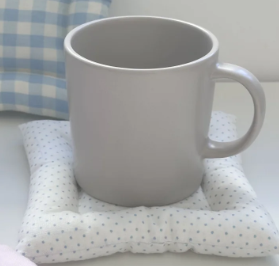
Creating custom items for your home brings a unique sense of satisfaction and personal style. Simple sewing projects are an excellent entry point for beginners and a relaxing activity for experienced crafters. This guide will walk you through two fantastic, functional, and beginner-friendly projects: stylish fabric coasters and a versatile fabric storage box. Both projects require basic sewing skills and result in professional-looking items you can use daily or give as thoughtful handmade gifts. We will cover everything from material selection to the final stitch, ensuring you have all the information needed for a successful crafting session.
Essential Tools and Materials for Simple Sewing Projects
Before you begin, gathering the right tools and materials is crucial for a smooth sewing experience. While each project has specific fabric requirements, the basic toolkit remains largely the same. Having these items on hand will prepare you for these projects and many others in the future.
Core Sewing Toolkit
- Sewing Machine: A basic sewing machine capable of a straight stitch is all you need. Ensure it is in good working order with a fresh needle.
- Fabric Scissors or Rotary Cutter: Sharp scissors dedicated to fabric are a must for clean cuts. A rotary cutter, mat, and ruler can provide even greater precision.
- Thread: All-purpose polyester thread in a color that matches or contrasts with your fabric is a standard choice.
- Ruler or Measuring Tape: Essential for accurately measuring and cutting your fabric pieces.
- Pins or Sewing Clips: To hold fabric pieces together securely while you sew.
- Iron and Ironing Board: Pressing your fabric and seams is a critical step for achieving a crisp, professional finish.
- Seam Ripper: A helpful tool for correcting any mistakes.
Project-Specific Materials
For the projects in this guide, you will also need specific types of fabric and interfacing. These give the final items their structure and durability.
- Cotton Fabric: Quilting cotton is an excellent choice for both projects due to its stability, ease of use, and wide variety of prints and colors. You will need it for the main fabric and the lining.
- Fusible Fleece or Interfacing: This material is ironed onto the back of your fabric to add structure and sturdiness. Fusible fleece provides a soft, padded feel, ideal for the storage box, while a medium-weight interfacing can give coasters a bit more body.

Project 1: Crafting Your Own Stylish Fabric Coasters
Fabric coasters are a quick and satisfying project, perfect for using up scrap fabric. They protect your furniture, add a pop of color to your decor, and make wonderful gifts. This tutorial guides you through creating a simple, double-sided coaster.
Materials and Cutting Guide for Coasters
For one coaster, you will need to cut two identical squares of fabric. A standard coaster size is around 4.5 x 4.5 inches, but you can adjust this to your preference.
- Fabric A (Top): Cut one square measuring 4.5 x 4.5 inches.
- Fabric B (Bottom): Cut one square measuring 4.5 x 4.5 inches.
- Optional Interfacing: If you want a stiffer coaster, cut one 4.5 x 4.5 inch square of medium-weight fusible interfacing and apply it to the wrong side of Fabric A before starting.
Step-by-Step Sewing Instructions for Coasters
Follow these steps carefully to assemble your coaster. A standard seam allowance of 1/4 inch is recommended for this project.
- Prepare the Fabric: Place your two fabric squares right sides together, ensuring all edges are perfectly aligned. Pin or clip the layers together to prevent them from shifting.
- Sew Around the Edges: Starting in the middle of one side, sew around the perimeter of the square using a 1/4 inch seam allowance. Pivot at each corner by stopping with the needle down, lifting the presser foot, turning the fabric 90 degrees, and then lowering the presser foot to continue sewing.
- Leave an Opening: Crucially, you must leave a 2-inch gap unsewn on one of the sides. This opening is for turning the coaster right side out. Remember to backstitch at the beginning and end of your sewing to secure the stitches.
- Clip the Corners: Before turning, carefully snip off the fabric at each of the four corners, getting close to but not cutting through the stitch line. This reduces bulk and allows for sharp, crisp corners.
- Turn and Press: Gently turn the coaster right side out through the opening you left. Use a dull, pointed tool like a chopstick or a point turner to carefully push out the corners. Once it is fully turned, press the coaster flat with a hot iron, making sure to neatly fold in the raw edges of the opening so they are flush with the rest of the seam.
- Topstitch to Finish: To close the opening and add a professional decorative touch, topstitch around the entire perimeter of the coaster, about 1/8 inch from the edge. This final seam will seal the turning gap and help the coaster lie flat.

Project 2: Creating a Versatile Fabric Storage Box
A fabric storage box is a practical solution for organizing small items on a desk, in a closet, or on a shelf. This project introduces the technique of “boxing corners” to create a three-dimensional shape. Using fusible fleece gives the box excellent structure and a soft feel.
Gathering Supplies and Cutting Fabric for the Box
The dimensions provided will create a small storage box. You can easily scale these up or down for different sizes. The key is to cut the outer fabric, lining fabric, and fusible fleece to the same initial dimensions.
- Outer Fabric: Cut one piece measuring 10.5 x 8 inches.
- Lining Fabric: Cut one piece measuring 10.5 x 8 inches.
- Fusible Fleece: Cut one piece measuring 10.5 x 8 inches.
Assembling the Outer Box and Lining
This process involves creating two separate “bags”—one for the outside and one for the lining—which will later be nested together.
- Apply Fusible Fleece: Following the manufacturer’s instructions, iron the fusible fleece onto the wrong side of your outer fabric piece. This will give the box its primary structure.
- Sew the Outer Box Seams: Fold the outer fabric in half with right sides together, so it now measures 5.25 x 8 inches. Sew down the two open sides (the long 8-inch side and one of the short sides) using a 1/4 inch seam allowance. Leave the top short side open.
- Sew the Lining Seams: Repeat the exact same process with the lining fabric. Fold it in half with right sides together and sew down the two open sides. However, on the long side of the lining, you must leave a 3-inch opening in the middle of the seam. This will be used for turning the entire box right side out at the end.
The “Boxing the Corners” Technique Explained
This is the magic step that gives the box its depth. You will perform this on both the outer box and the lining.
- Align the Seams: Take the outer box piece, which is currently a flat bag. At one of the bottom sewn corners, pinch the fabric and pull it apart so the side seam and the bottom fold line meet and lie flat on top of each other. This will form a triangle point.
- Mark and Sew: Measure 1.5 inches down from the very tip of the triangle and draw a line straight across. Sew directly on this line. This creates the boxed corner.
- Repeat: Do this for the other bottom corner of the outer box. Then, repeat the entire process for the two bottom corners of the lining piece.
- Trim the Excess: After sewing, you can trim the excess fabric from the triangle points, about 1/4 inch away from your new seam line, to reduce bulk.
Final Assembly and Topstitching for a Professional Look
Now it’s time to put the two pieces together to form the final storage box.
- Nest the Pieces: Turn the outer box right side out so the fleece and seams are on the inside. Leave the lining piece inside out. Insert the outer box inside the lining, so their right sides are facing each other.
- Align and Sew the Top Edge: Carefully align the top raw edges of the outer box and the lining. Match up the side seams and pin or clip them together all the way around the top opening.
- Sew the Top Seam: Sew all the way around the top edge with a 1/4 inch seam allowance, joining the outer box and lining together.
- Turn the Box: Gently pull the outer box through the 3-inch opening you left in the side of the lining. Take your time with this step. Once fully turned, the box will be right side out, but the lining will be on the outside.
- Close the Lining Gap: Find the opening in the lining and either hand-stitch it closed with a ladder stitch for an invisible finish or sew it closed with your machine very close to the edge.
- Finish the Box: Push the lining down inside the outer box. Press the top edge with an iron to make it crisp. To ensure the lining stays in place and to give a clean finish, topstitch around the entire top opening, about 1/8 inch from the edge.

Pro Tips for Flawless DIY Fabric Crafts
Even simple projects can benefit from professional techniques. Applying these tips will elevate the quality of your finished items and make the sewing process more enjoyable.
- Pre-wash Your Fabric: Always wash and dry your fabric before cutting. This prevents shrinking and warping after your project is complete, especially for items like coasters that may be washed frequently.
- Press Every Seam: Ironing is not just for the end. Pressing your seams open or to one side as you sew helps with accuracy and results in a much flatter, neater final product.
- Use a Walking Foot: If you are working with thicker layers, such as the fabric with fusible fleece, a walking foot attachment for your sewing machine can help feed the layers through evenly and prevent shifting.
- Increase Stitch Length for Topstitching: When topstitching, slightly increasing your stitch length (e.g., from 2.5mm to 3.0mm or 3.5mm) can create a more attractive and prominent stitch line.
- Accurate Cutting is Key: The success of projects with structured shapes, like the storage box, begins with precise cutting. Double-check your measurements before cutting into your fabric.
By mastering these two simple yet versatile projects, you open the door to a world of creative possibilities. You can customize sizes, mix and match fabrics, and add embellishments to make each creation uniquely yours. Happy sewing!
Frequently Asked Questions (FAQ)
- What is the best type of fabric for these beginner projects?
- Quilting cotton is highly recommended for beginners. It is a stable, medium-weight woven fabric that is easy to cut and sew, and it doesn’t fray excessively. It also comes in an endless variety of colors and patterns, making it perfect for custom home decor items like coasters and storage boxes.
- What does ‘right sides together’ mean in sewing?
- “Right sides together” is a fundamental sewing instruction. It means placing your two pieces of fabric so that the printed or “pretty” sides are facing each other. You then sew your seam on the wrong side (the back or unprinted side) of the fabric. When you turn the project right side out, the seam will be hidden on the inside.
- Why is it necessary to clip the corners before turning?
- Clipping the corners involves trimming the excess fabric from the seam allowance at a corner point. This is crucial because it removes bulk, allowing you to turn the corner fully and achieve a sharp, flat, and professional-looking point. Without clipping, the excess fabric bunches up inside and creates a rounded, lumpy corner.
- Can I make the fabric storage box without fusible fleece?
- You can, but it will not be as structured. The fusible fleece is what gives the box its sturdiness and allows it to stand up on its own. If you omit it, the box will be soft and collapsible. For a less-stiff alternative, you could use a heavy-weight fusible interfacing, but fleece provides the best combination of softness and structure for this type of project.
- How do I ensure my topstitching is straight?
- To achieve a straight topstitch, sew slowly and use a guide. Many sewing machine presser feet have markings on them that correspond to distances from the needle. You can align the edge of your fabric with one of these markings (e.g., the 1/8″ or 1/4″ mark) and keep it aligned as you sew. Watching the guide, not the needle, is the key to a perfectly straight line.