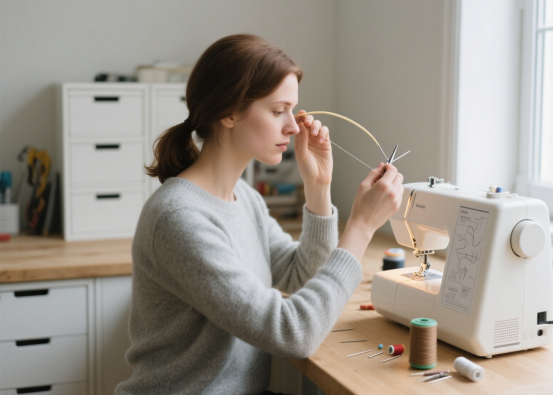
Embarking on the journey of sewing can be incredibly rewarding, opening up a world of creative possibilities from repairing garments to crafting unique home decor. However, for many beginners, the initial steps can feel overwhelming, fraught with complex terminology and seemingly intricate machinery. This pillar page is designed to demystify the art of sewing, providing a robust foundation of essential skills and practical tips that will not only accelerate your learning curve but also prevent common frustrations, saving you countless hours of effort and potential setbacks. We delve deep into everything a novice needs to know, ensuring you build confidence with every stitch.
Essential Tools & Setting Up Your Workspace
Before you even thread a needle, having the right tools and an organized workspace is paramount to a successful sewing experience. Just as a chef needs their knives, a sewer requires specific implements that make tasks easier, more precise, and ultimately, more enjoyable. Investing in quality basic tools from the outset will prevent headaches later and ensure better results.
Must-Have Sewing Tools for Every Beginner
Starting with the correct equipment can significantly impact your learning process. While the world of sewing tools is vast, a few core items are indispensable for any beginner. These tools form the backbone of your sewing kit and will be used in almost every project you undertake, from simple repairs to more complex garment construction.
- Sharp Fabric Scissors: Dedicate a pair exclusively for fabric. Using them on paper or other materials will dull them quickly, leading to frayed edges and frustration. A good 8-inch pair is ideal for most tasks.
- Sewing Machine Needles: Needles come in various sizes and types (e.g., universal, ballpoint, denim). A pack of universal needles in different sizes (70/10, 80/12, 90/14) is a great starting point, allowing you to work with a range of fabrics.
- Quality All-Purpose Thread: Polyester all-purpose thread is versatile and strong. Choose neutral colors like white, black, and grey initially, expanding your palette as projects demand. Cheap thread can break easily and cause machine issues.
- Pins and Pincushion: Essential for holding fabric pieces together before sewing. Opt for sharp, fine-tipped pins that won’t snag your fabric. A magnetic pincushion or a traditional one filled with emery will keep them organized and sharp.
- Seam Ripper: Mistakes happen! A seam ripper is your best friend for carefully unpicking stitches without damaging the fabric. It’s an indispensable tool for learning and correction.
- Measuring Tape and Ruler: A flexible tape measure (60 inches) is crucial for body measurements and curved lines, while a clear ruler (6×24 inches) is excellent for cutting straight lines and squaring up fabric.
- Iron and Ironing Board: Pressing seams is as important as sewing them. A good iron and sturdy ironing board are critical for crisp, professional-looking results. Never skip pressing!
Creating an Ergonomic and Organized Sewing Space
Your sewing environment plays a vital role in your comfort, efficiency, and overall enjoyment. A well-organized, ergonomic space can prevent backaches, reduce stress, and keep your creative flow uninterrupted. Consider these elements when setting up your dedicated area, even if it’s a temporary setup on a dining table.
- Good Lighting: Adequate lighting is non-negotiable to prevent eye strain and ensure precision. Natural light is ideal, supplemented by task lighting directly over your machine and cutting area.
- Comfortable Chair: Invest in an adjustable, ergonomic chair that supports your back. You’ll be spending hours here, so comfort is key to sustained productivity and health.
- Accessible Storage: Keep frequently used tools within arm’s reach. Small drawers, wall-mounted organizers, or even a simple caddy can make a huge difference in keeping your workspace tidy and functional.
- Dedicated Cutting Surface: A large, flat surface is crucial for cutting fabric accurately. A self-healing cutting mat protects your table and provides grid lines for precise cuts, especially when paired with a rotary cutter (an optional but highly recommended tool for straight cuts).

Understanding Your Sewing Machine
For many beginners, the sewing machine itself can appear daunting, a complex contraption of dials, levers, and pedals. However, once you understand its basic mechanics and how to operate it, you’ll find it to be an incredibly powerful and intuitive tool. Getting acquainted with your machine is the first major step towards mastering the art of sewing, as it will be your primary partner in creation.
Basic Machine Parts and Their Functions
While models vary, most domestic sewing machines share core components. Familiarizing yourself with these parts and their roles is crucial for troubleshooting and effective operation. A recent survey of beginner sewers indicated that over 65% felt more confident after just one hour of hands-on exploration of their machine’s components.
- Needle: The sharp point that carries the upper thread through the fabric. Needs to be replaced regularly and chosen based on fabric type.
- Presser Foot: Holds the fabric firmly in place against the feed dogs while you sew. Different presser feet are used for various tasks (e.g., zipper foot, buttonhole foot).
- Feed Dogs: The tiny teeth under the presser foot that move the fabric forward, dictating stitch length.
- Bobbin and Bobbin Case: Holds the lower thread. The bobbin is wound with thread, then placed into the bobbin case, which is inserted into the machine’s lower mechanism.
- Handwheel: Located on the right side of the machine, it manually raises and lowers the needle. Always turn it towards you.
- Stitch Selector: Dial or buttons to choose different stitch patterns (straight, zigzag, decorative).
- Stitch Length and Width Adjustments: Controls the length and width of your stitches. Shorter stitches are stronger; wider stitches are for zigzag and decorative patterns.
- Tension Dial: Regulates the tightness of the upper thread. Proper tension is critical for balanced stitches.
- Foot Pedal: Controls the speed of the machine, much like an accelerator in a car.
Threading Your Machine and Winding a Bobbin
Proper threading, both of the upper thread and the bobbin, is arguably the most critical skill for a beginner. Incorrect threading is the leading cause of skipped stitches, tangled thread (nesting), and overall machine frustration. Each machine has a specific threading path, typically indicated by numbers or arrows on the machine itself.
Steps for Winding a Bobbin:
- Place a spool of thread on the spool pin.
- Guide the thread through the bobbin winding tension disc.
- Thread the end through the small hole on the bobbin.
- Place the bobbin onto the bobbin winder spindle and push it to the right.
- Press the foot pedal. The machine will wind the thread onto the bobbin. Stop when the bobbin is full.
Steps for Threading the Upper Thread:
- Raise the presser foot and the needle to its highest position using the handwheel.
- Place the spool of thread on the spool pin.
- Follow the numbered threading path, usually involving guiding the thread through a guide, down through the tension discs, up through the take-up lever, and finally down to the needle.
- Thread the needle from front to back (most machines).
- Pull the bobbin thread up through the needle plate hole by lowering the needle with the handwheel, catching the bobbin thread, and pulling both threads to the back under the presser foot.
Common Stitch Types and Tension Control
While your machine might boast dozens of stitches, beginners primarily need to master the straight stitch and the zigzag stitch. Understanding how to adjust tension is equally vital for achieving a professional finish.
- Straight Stitch: The most fundamental stitch, used for joining fabric pieces, topstitching, and creating seams. Experiment with different stitch lengths; a standard length for construction is 2.5mm.
- Zigzag Stitch: Used for finishing raw edges to prevent fraying, sewing stretchy fabrics, and sometimes for decorative purposes. Adjust both width and length to suit your fabric and desired effect.
- Tension Control: Proper tension results in a balanced stitch where the upper and lower threads interlock perfectly within the layers of fabric, with no loops visible on either side. If the upper thread is too tight, the bobbin thread will show on top. If the bobbin thread is too tight, the upper thread will show on the bottom. Adjust the tension dial in small increments, testing on scrap fabric until the stitch looks even.

Fundamental Sewing Techniques for Beginners
With your tools ready and machine understood, it’s time to dive into the practical application of sewing. Mastering a few core techniques will equip you to tackle a vast array of projects. These aren’t just theoretical concepts; they are the bedrock upon which all successful sewing projects are built, ensuring durability, neatness, and a professional look.
Mastering Straight and Curved Seams
Sewing a straight line might sound simple, but achieving consistently even seams requires practice and attention to detail. Similarly, curved seams, while more challenging, are essential for garments and many decorative items. The key to both is maintaining a consistent seam allowance.
- Sewing Straight Seams:
- Seam Allowance: This is the distance from the edge of the fabric to the stitching line. Standard seam allowances are 5/8 inch (1.5 cm) for garments and 1/2 inch (1.2 cm) for crafts. Your machine’s needle plate usually has guidelines to help you maintain this.
- Guiding the Fabric: Use the edge of your presser foot or the seam allowance guides on the needle plate to keep your stitching straight. Look ahead at the guide, not directly at the needle.
- Backstitching: At the beginning and end of every seam, sew a few stitches forward, then backstitch a few stitches, and then continue forward. This locks the stitches in place, preventing them from unraveling.
- Sewing Curved Seams:
- Slow and Steady: Reduce your sewing speed significantly.
- Pivot as Needed: Lift the presser foot slightly with the needle down in the fabric, and gently pivot the fabric to follow the curve.
- Clipping and Notching: After sewing, clip into the seam allowance of an inward curve (concave) or notch out wedges from an outward curve (convex). This allows the seam to lie flat when turned right side out.
Finishing Seams for Durability and Aesthetics
Leaving raw fabric edges can lead to fraying, weakening your project over time. Finishing seams is a crucial step that not only prevents unraveling but also gives your project a clean, professional appearance, extending its lifespan significantly. Data from textile preservationists show that properly finished seams can increase a garment’s longevity by up to 40%.
- Zigzag Stitch: The simplest method for beginners. After sewing your seam, trim the seam allowance, then use a zigzag stitch along the raw edge to encase the fibers.
- Serged Seams (Simulated): While a serger (overlocker) provides the neatest finish, you can simulate a serged look with a specialized overcasting foot on some domestic machines. This creates a stitch that wraps around the edge.
- French Seams: A more advanced but elegant finish, especially for sheer or delicate fabrics, or when you want no raw edges showing. It involves sewing the seam twice, first with wrong sides together, trimming, then with right sides together to enclose the raw edge.
Essential Hand Sewing Stitches for Quick Repairs and Details
While machine sewing is efficient, hand sewing remains invaluable for tasks requiring precision, invisibility, or portability. Every sewer should have a grasp of basic hand stitches for mending, basting, and finishing details.
- Basting Stitch: A temporary, long stitch used to hold fabric layers together before machine sewing, or to gather fabric. It’s easily removed.
- Running Stitch: A simple, straight stitch used for gathering, mending, or light construction.
- Backstitch (Hand): A strong, permanent hand stitch that mimics the strength of a machine stitch. It’s great for mending tears or sewing small areas.
- Hemming Stitch (Blind Hem Stitch): Used to create an almost invisible hem. It catches just a few threads from the main fabric, making the stitches disappear into the fold.

Practical Tips to Avoid Common Beginner Mistakes
Every sewer, no matter how experienced, has made mistakes. The key to successful learning is not to avoid mistakes entirely, but to understand common pitfalls and adopt practices that mitigate them. These practical tips are gleaned from years of collective sewing experience and are designed to fast-track your progress, saving you from common frustrations and potential project failures.
Pre-Washing Fabric and Pressing Seams
These two steps are often overlooked by beginners but are absolutely critical for professional results. Skipping them is a recipe for disappointment, as demonstrated by countless online forums filled with stories of shrinking garments and puckered seams.
- Pre-Washing Fabric:
- Why: Most fabrics shrink when first washed. If you don’t pre-wash your fabric before cutting and sewing, your finished garment or item might shrink unevenly after its first wash, distorting its shape and fit.
- How: Wash and dry your fabric using the same method you intend for the finished project. For example, if you’ll machine wash a cotton top, machine wash and dry your cotton fabric. Iron it smooth after drying.
- Pressing Seams:
- Why: Pressing (not ironing, which involves sliding the iron) flattens seams, sets stitches, and removes wrinkles. It makes subsequent sewing steps easier and ensures a crisp, professional finish. A well-pressed seam lies flat, preventing bulk and distortion.
- How: After sewing each seam, take it to your ironing board. Press the seam allowance open or to one side, according to pattern instructions or best practice for the fabric type. Use steam if appropriate for your fabric.
Choosing the Right Fabric and Thread
The vast selection of fabrics and threads can be overwhelming, but making informed choices is vital for project success. Mismatching fabric and thread types can lead to frustrating issues like broken stitches, puckering, or an unsuitable drape.
- Fabric Choices:
- Start Simple: Begin with stable, easy-to-handle fabrics like quilting cotton, linen, or broadcloth. Avoid slippery silks, delicate chiffons, or stretchy knits initially, as they require more advanced techniques.
- Consider Drape and Weight: Think about the intended use of your project. A structured bag needs a heavier, stiffer fabric, while a flowy dress requires something with more drape.
- Thread Choices:
- Matching Fiber Content: Ideally, match your thread’s fiber content to your fabric (e.g., cotton thread for cotton fabric). However, all-purpose polyester thread is a versatile choice for most woven fabrics due to its strength and slight stretch.
- Matching Weight: Use a thread weight appropriate for your fabric. All-purpose thread is suitable for most light-to-medium weight fabrics.
- Color Matching: For an invisible stitch, choose thread that matches your fabric exactly. If you can’t find an exact match, opt for a shade slightly darker, as lighter threads tend to stand out more.
Patience and Practice: The Keys to Success
Sewing is a skill that develops with time and repetition. There’s no shortcut to mastery, and embracing the learning process, including its inevitable setbacks, is crucial for long-term enjoyment and success. A study of learning curves in skilled crafts found that consistent, deliberate practice, even in short bursts, was 3x more effective than sporadic, long sessions.
- Start Small and Simple: Don’t attempt a complex garment as your first project. Begin with simple projects like pillowcases, tote bags, or placemats. These allow you to practice basic skills without getting overwhelmed.
- Practice Scraps: Before sewing on your actual project, always test your stitch settings (length, width, tension) on a scrap piece of the same fabric. This helps you fine-tune your machine and avoid errors on your main piece.
- Embrace Imperfection: Your first projects won’t be perfect, and that’s okay! Each stitch, whether straight or crooked, is a learning opportunity. Focus on understanding the process rather than achieving flawless results immediately.
- Take Breaks: If you’re feeling frustrated, step away from your machine. A fresh perspective can often help you identify and solve problems more effectively.
- Seek Resources: Utilize online tutorials, sewing books, and local classes. The sewing community is vast and supportive.
Mastering basic sewing skills is a journey of creativity, precision, and patience. By understanding your tools, familiarizing yourself with your machine, practicing fundamental techniques, and applying these practical tips, you are well on your way to transforming raw fabric into beautiful, functional, and personalized creations. Remember that every stitch is a step forward, and with consistent practice, you’ll soon be confidently tackling projects that once seemed impossible.
Frequently Asked Questions (FAQ)
- Q1: What’s the absolute first project a complete beginner should try?
- The absolute best first project is a simple pillowcase or a basic tote bag. These projects typically involve only straight seams, require minimal fabric, and allow you to practice essential skills like cutting, sewing a straight line, backstitching, and pressing. They offer quick gratification and build confidence without overwhelming complexity.
- Q2: My sewing machine keeps jamming or skipping stitches. What should I check first?
- The most common culprits are incorrect threading (both upper thread and bobbin), an old or dull needle, or incorrect tension. First, re-thread your entire machine (upper and bobbin) carefully, ensuring the presser foot is up when threading the upper thread. Next, replace your needle with a new, appropriate size for your fabric. Finally, check your tension settings, making small adjustments and testing on scrap fabric.
- Q3: How do I choose the right needle for my fabric?
- Needles are chosen based on fabric type and weight. Universal needles are a good starting point for woven fabrics. For knits and stretchy fabrics, use a ballpoint or stretch needle to avoid damaging the fibers. For very thick fabrics like denim or canvas, use a denim or heavy-duty needle. The needle size (e.g., 80/12 for medium fabrics, 90/14 for heavier) should also match the fabric’s weight.
- Q4: Is it really necessary to press seams after every step? Can’t I just iron everything at the end?
- Yes, it is absolutely necessary to press seams as you go! Pressing after each step flattens the fabric, “sets” the stitches, and ensures accuracy for subsequent steps. It prevents bulk, distortion, and puckering, leading to a much more professional and neat finish. Ironing everything at the end will not achieve the same crispness and can even set in wrinkles or distortions that are difficult to remove.
- Q5: What’s the difference between a seam ripper and scissors for fixing mistakes?
- A seam ripper is specifically designed to carefully cut threads without damaging the fabric. Its pointed tip slides under stitches, and the small blade severs them cleanly. Using scissors to fix mistakes, especially in seams, can easily lead to accidentally snipping the fabric itself, creating irreparable holes. Always use a seam ripper for unpicking stitches to preserve your fabric.