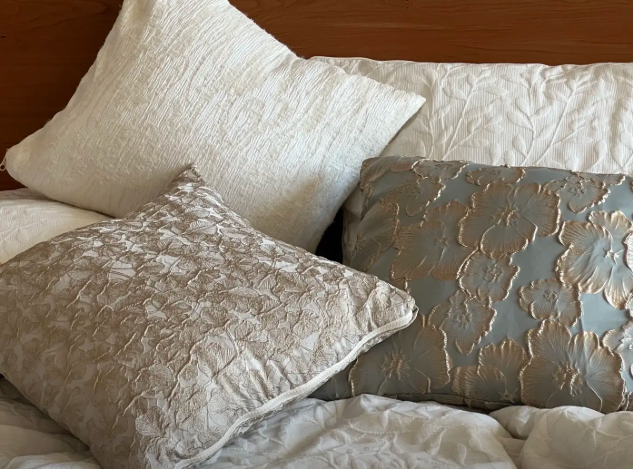
The Art of Crafting Handmade Cushions and Pillows
Creating a cozy nest within your home relies heavily on the tactile comfort and visual appeal of soft furnishings. Handmade cushions and pillows are the quintessential starting point for any home stylist looking to inject personality, warmth, and structural elegance into a room. Unlike mass-produced alternatives, crafting your own pillows allows for absolute control over fabric quality, stuffing density, and dimensional accuracy, ensuring that every piece perfectly complements your existing interior architecture.
Selecting the Right Fabrics and Stuffing Materials
The foundation of a durable and aesthetically pleasing cushion lies in the meticulous selection of raw materials. The exterior fabric must balance visual texture with daily wear resistance, while the interior stuffing dictates the structural integrity and comfort level of the piece. Understanding the interplay between these elements is crucial for a professional-grade finish.
- Upholstery-Weight Cottons and Linens: These natural fibers offer exceptional breathability and a crisp, tailored look. They are ideal for living room environments where durability is paramount, as they resist pilling and hold their shape beautifully over time.
- Velvets and Silks: For a touch of opulent luxury, these fabrics reflect light dynamically and introduce deep, rich color palettes. However, they require careful handling, specialized needles, and often a sturdy backing fabric to prevent seam slippage.
- Hypoallergenic Polyfill: A highly accessible and affordable stuffing option that provides excellent bounce-back. It is perfect for decorative pillows that require a rigid, plump appearance without the risk of triggering allergies.
- Feather and Down Inserts: The gold standard for “karate-chop” styling and supreme comfort. Down inserts mold to the body and offer a luxurious weight, though they require tightly woven down-proof ticking to prevent feathers from escaping.
Once your materials are selected, the pre-washing phase cannot be skipped. Pre-shrinking your fabrics ensures that future laundering will not distort the shape of your meticulously sewn cushion covers, preserving the precise measurements you worked so hard to establish.
Step-by-Step Cushion Sewing Techniques
Executing a flawless cushion cover requires precision cutting and an understanding of closure mechanisms. The envelope closure is highly recommended for beginners due to its simplicity and elegant overlap, while the invisible zipper offers a seamless, high-end commercial finish. When cutting your fabric, always add a standard half-inch seam allowance to all sides. For a plumper cushion, professional sewists often cut the fabric cover exactly the same size as the insert (ignoring the seam allowance expansion), which forces the insert to compress slightly, resulting in a beautifully overstuffed appearance.

Creating One-of-a-Kind Patchwork Cushions from Leftover Fabric
Sustainability in crafting is not just an environmental imperative; it is an avenue for profound creative expression. Patchwork, the art of sewing smaller fabric scraps together to form a cohesive whole, breathes new life into leftover textiles. Designing a one-of-a-kind patchwork cushion transforms discarded remnants into a stunning focal point, rich with history and geometric complexity.
Preparing and Cutting Fabric Scraps
The success of a patchwork project hinges on the mathematical precision of your cuts. Irregular squares will inevitably lead to puckered seams and a distorted final product. Utilizing a self-healing cutting mat, a clear acrylic ruler, and a sharp rotary cutter is non-negotiable for achieving the crisp, perfectly angled edges required for seamless piecing.
Begin by sorting your scraps by color value and fabric weight. It is highly advisable to use fabrics of similar weights—such as mixing various quilting cottons—to ensure the tension remains consistent across the cushion face. Iron all scraps flat before cutting them into standardized shapes, such as three-inch squares or uniform triangles, depending on your chosen block pattern.
Piecing and Quilting Your Patchwork Design
With your geometric pieces prepared, the assembly phase begins. This requires a systematic approach to ensure seams align perfectly, creating sharp intersections that define high-quality patchwork.
- Chain Piecing: To accelerate the process, sew your squares together in pairs using a continuous thread, feeding one pair after another through the sewing machine without cutting the thread in between. This technique saves both time and thread.
- Pressing Seams Open: Unlike traditional garment construction where seams are often pressed to one side, pressing patchwork seams open reduces bulk at the intersections, allowing the fabric to lay perfectly flat.
- Adding Batting and Backing: To give your patchwork a professional, quilted texture, layer the pieced top with a thin cotton batting and a muslin backing. Pin the layers securely and quilt along the seam lines (stitch-in-the-ditch) to anchor the design and add structural stability.
This meticulous layering and quilting process not only reinforces the delicate patchwork seams but also adds a luxurious, padded dimension to the cushion, elevating it from a simple fabric cover to a tactile piece of art.

The Magic of Aroma: Crafting Custom Cloth Sachets
The olfactory dimension of home decor is frequently overlooked, yet it possesses a magical ability to influence mood and ambiance. Crafting custom cloth sachets brings the magic of aroma directly under your needle tip. These small, elegantly sewn pouches can be tucked into linen closets, placed beneath pillows, or hung in wardrobes to gently diffuse natural fragrances throughout your living spaces.
Best Herbs and Essential Oils for Sachets
The botanical filling is the heart of the sachet. Selecting high-quality, fully dried organic herbs is critical, as any residual moisture can lead to mold growth within the enclosed fabric. Lavender remains the undisputed champion of sachet fillings due to its calming properties and long-lasting scent profile, but the blending possibilities are endless.
Consider mixing dried rose petals with a few drops of geranium essential oil for a romantic, floral diffusion. For a more robust, insect-repelling sachet perfect for winter coat storage, a blend of cedar shavings, dried rosemary, and cloves is highly effective. To lock in the fragrance, mix your chosen herbs with a fixative like dried orris root powder, which absorbs essential oils and releases them slowly over several months.
Sewing and Decorating Your Aromatic Pouches
Sachets offer a wonderful canvas for miniature artistry. Because they require very little fabric, they are the perfect project for utilizing expensive silk brocades or intricately embroidered linen scraps that are too small for larger projects.
- Sizing and Cutting: Cut two identical fabric squares, typically 4×4 or 5×5 inches. If you plan to add embroidery or applique, complete this detailed handwork on the front piece before assembling the pouch.
- Stitching the Perimeter: Place the right sides of the fabric together and sew around the edges with a tight stitch length to prevent fine herbs from escaping. Leave a small, one-inch opening on one side for turning and filling.
- Filling and Sealing: Clip the corners to reduce bulk, turn the pouch right-side out, and press the edges crisp. Use a small funnel to pack the aromatic blend tightly into the pouch, then use a blind ladder stitch to hand-sew the opening completely shut.
To finish, you can attach a small loop of velvet ribbon to one corner for hanging, or embellish the borders with delicate lace trim, transforming a simple functional item into a beautiful, sensory gift.

Mastering Tablecloth Handcraft Skills for Elegant Dining
Tablecloths are profoundly transformative; they are not just for covering the table to protect the wood, but serve as the foundational canvas for your entire dining room aesthetic. Mastering the handcraft skills required to create custom tablecloths allows you to tailor your linens perfectly to the unique dimensions of your dining furniture, ensuring a flawless drape and an atmosphere of bespoke elegance.
Measuring and Fabric Selection for Dining Tables
The mathematical calculation of the “drop”—the amount of fabric that hangs over the edge of the table—is the most critical step in tablecloth construction. A standard casual drop ranges from 8 to 12 inches, while formal settings may require a dramatic floor-length drop of up to 30 inches. To calculate your fabric needs, measure the length and width (or diameter) of your table, and add twice the desired drop length, plus an additional two inches for deep, luxurious hems.
When selecting fabrics, consider the functional demands of the dining environment. Pure linen offers an unmatched rustic elegance and drapes beautifully, though it requires diligent ironing. Cotton-polyester blends provide excellent wrinkle resistance and stain release, making them ideal for everyday family use. Ensure the fabric width is sufficient to cover the table without requiring a center seam, which can disrupt the visual flow of the tabletop.
Advanced Hemming and Embellishment Techniques
The hallmark of a professionally crafted tablecloth is its finishing. A simple folded hem may suffice for casual use, but mastering the mitered corner elevates the piece to heirloom quality. Mitered corners eliminate the bulky overlap of fabric at the corners, creating a sharp, perfectly angled finish that allows the tablecloth to hang smoothly.
To execute a mitered corner, press your hem allowances precisely, unfold, and stitch diagonally across the corner intersection. Trim the excess fabric and turn the corner out for a crisp, professional point. Beyond hemming, consider embellishing the edges with a subtle hemstitch, attaching a border of contrasting fabric, or sewing a delicate row of cotton lace along the drop line to introduce texture and historical charm to your dining presentation.

Upcycling Old T-Shirts: Hand-Sewn Woven Floor Mats
The intersection of sustainable living and home crafting finds its ultimate expression in the old T-shirt transformation project. Rather than discarding worn-out garments into landfills, you can harvest the soft, durable cotton jersey to create thick, hand-sewn woven floor mats. This project not only produces a highly functional, washable rug perfect for kitchens or bathrooms but also serves as a brilliant exercise in zero-waste crafting.
Creating Continuous T-Shirt Yarn (Tarn)
The first phase of this transformation is converting a standard T-shirt into a continuous ball of workable yarn. This process requires a specific cutting technique that maximizes the seamless length of the fabric. Lay the T-shirt flat and cut off the bottom hem and the top section just beneath the armpits, leaving a large tube of fabric.
Cut horizontal strips across the tube, stopping about one inch before the opposite edge so the tube remains connected. Once all strips are cut, open the uncut section and cut diagonally from one slit to the next. This continuous spiral cut yields one incredibly long strip of fabric. By pulling firmly on this strip, the raw edges of the jersey knit will naturally curl inward, hiding the cuts and forming a smooth, tubular yarn.
Braiding and Coiling Your Woven Rug
With your T-shirt yarn prepared in various colors, the construction of the floor mat relies on traditional braiding and coiling techniques. The density of the braid directly correlates to the durability and thickness of the final rug.
- The Braiding Process: Take three strands of T-shirt yarn, tie them together at the top, and anchor them to a heavy object. Braid them tightly and evenly. When you reach the end of a strand, seamlessly sew a new strip onto the tail to continue the braid indefinitely.
- Coiling the Base: On a flat surface, begin coiling the long braid into a tight spiral. The center must be extremely secure, as it dictates the structural integrity of the entire mat.
- Hand-Sewing the Coils: Using a heavy-duty tapestry needle and strong upholstery thread, stitch the adjacent sides of the braided coil together. Pass the needle through the loops of the braid rather than piercing the thick fabric directly, using a figure-eight or zig-zag lacing technique.
As you expand the coil, ensure you are not pulling the lacing thread too tightly, which will cause the mat to buckle and form a bowl shape. The mat must remain perfectly flat on the table during the sewing process to guarantee it will lie flush against your floor upon completion.

Essential Tools and Materials for Home Fabric Crafts
Achieving professional-level results in handmade fabric crafts requires more than just enthusiasm; it demands an arsenal of specialized tools. The difference between a frustrating crafting experience and a joyful, seamless process often comes down to the quality and appropriateness of the instruments in your sewing kit. Investing in high-grade tools ensures precision, reduces physical strain, and dramatically elevates the final aesthetic of your cushions, sachets, and mats.
Must-Have Sewing Notions and Equipment
At the core of your toolkit should be a reliable, heavy-duty sewing machine capable of handling multiple layers of fabric, especially crucial when quilting patchwork or attaching thick piping to cushions. However, the supporting cast of hand tools is equally vital.
Fabric shears must be kept razor-sharp and used exclusively for textiles to prevent dulling. A rotary cutter paired with a self-healing mat is indispensable for the perfectly straight lines required in patchwork and tablecloth measuring. Additionally, an assortment of heavy-duty needles, including leather or denim needles, is necessary when piercing through dense layers of braided T-shirt yarn. Finally, a high-quality steam iron is arguably the most critical tool; pressing seams flat at every stage of construction is the ultimate secret to achieving a crisp, store-bought finish on all your handmade home decor items.

Care and Maintenance of Handmade Fabric Decor
The lifespan of your handcrafted home textiles is directly proportional to the care and maintenance routines you establish. Unlike mass-produced items treated with harsh chemical stain repellents, handmade cushions, aromatic sachets, and upcycled floor mats require gentle, specific laundering techniques to preserve their colors, structural integrity, and botanical fragrances.
Laundering and Preservation Strategies
Understanding the specific washing requirements for different fibers is essential to prevent shrinkage, color bleeding, and seam unraveling. Always refer back to the pre-washing behavior of your chosen fabrics to guide your long-term care strategy.
- Cushions and Tablecloths: Removable cotton and linen covers should be washed in cold water on a gentle cycle using a mild, pH-neutral detergent. Avoid the harsh heat of a tumble dryer; instead, air-dry these items flat to prevent distortion. Iron them while slightly damp to restore their crisp, smooth finish.
- Woven T-Shirt Mats: Because these are constructed from tightly coiled jersey cotton, they are surprisingly robust. They can typically be machine washed on a bulky cycle. However, they must be laid completely flat to dry, as hanging them while waterlogged will stretch and warp the heavy braided coils.
- Aromatic Sachets: Cloth sachets must never be submerged in water, as the dried herbs inside will rot. To refresh a sachet that has lost its scent, gently crush the pouch in your hands to break open the botanical oils, or carefully inject a few drops of pure essential oil directly into the fabric using a fine syringe.
By adhering to these meticulous care protocols, your handcrafted fabric decor will remain vibrant, structurally sound, and aromatically pleasing for years, serving as enduring testaments to your crafting dedication.
Frequently Asked Questions (FAQ)
- Q1: What is the best fabric for a beginner attempting to sew their first cushion cover?
- Medium-weight quilting cotton or a cotton-linen blend is highly recommended for beginners. These fabrics are stable, do not slip under the presser foot, are easy to measure and cut, and hold a crease exceptionally well when pressed with an iron, making the sewing process highly manageable.
- Q2: How do I prevent my patchwork seams from puckering and looking distorted?
- Puckering is usually caused by inaccurate cutting, inconsistent seam allowances, or incorrect thread tension. Always use a rotary cutter for precise squares, strictly maintain a 1/4-inch seam allowance, press your seams open immediately after sewing, and ensure your machine’s tension is properly calibrated for the fabric weight.
- Q3: How long does the scent in a handmade cloth sachet typically last?
- A well-crafted sachet using high-quality dried herbs and essential oils can retain its fragrance for 6 to 12 months. Adding a fixative like orris root powder helps prolong the scent. When the aroma fades, you can revitalize it by gently crushing the herbs to release trapped oils or by adding a few drops of fresh essential oil.
- Q4: Can I vacuum a hand-sewn woven floor mat made from old T-shirts?
- Yes, you can vacuum woven T-shirt mats, but you should use a suction-only setting. Avoid using the rotating beater bar or brush roll, as the aggressive bristles can snag the jersey fabric, pull up the hand-stitched lacing threads, and cause the braided coils to fray or separate.
- Q5: What is the standard drop length for a formal dining tablecloth?
- For formal dining settings, a drop length of 15 to 30 inches is standard. A 15-inch drop elegantly covers the lap of the seated guests, while a 30-inch drop (puddling just above the floor) provides a highly dramatic, luxurious aesthetic suitable for weddings, banquets, and high-end holiday dinners.