In the world of garment construction and textile arts, the difference between a homemade look and a professional finish lies in the mastery of specific stitching techniques. Whether you are reinforcing a heavy-duty seam or adding delicate decorative flourishes to a handmade gift, understanding the mechanics of different stitches is vital. This guide synthesizes core sewing disciplines—ranging from structural edge finishing to advanced decorative applications—to provide a comprehensive roadmap for any sewing project.
Mastering Overlock and Zigzag Stitches for Edge Protection
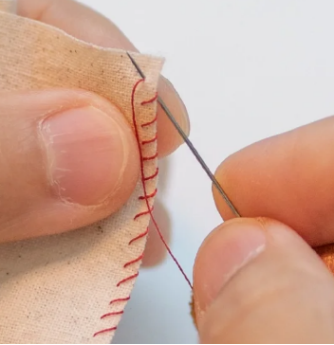
Edge finishing is perhaps the most critical step in ensuring the longevity of a garment. Without proper treatment, woven fabrics will inevitably fray, leading to seam failure and aesthetic degradation. The overlock stitch and the zigzag stitch represent the two primary methods for securing raw edges, each serving distinct purposes based on the equipment available and the fabric type.
The Mechanics of the Overlock (Serger) Stitch
The overlock stitch, typically performed by a specialized machine known as a serger or overlocker, uses multiple threads (usually 3 to 5) to wrap around the edge of the fabric. This process simultaneously trims the excess seam allowance with a built-in blade, creating a clean, encased edge that is common in ready-to-wear clothing. The overlock stitch is prized for its elasticity, making it the industry standard for knit fabrics where seam flexibility is mandatory to prevent thread breakage during wear.
The Versatile Zigzag Stitch for Domestic Machines
For those without a serger, the zigzag stitch is an indispensable alternative found on almost every domestic sewing machine. By adjusting the width and length of the zigzag, you can customize the level of protection. A wider zigzag is ideal for heavy denim or canvas, while a narrower, shorter zigzag (sometimes called a satin stitch) can be used for appliqué or finer edge finishing. To prevent the “tunneling” effect—where the fabric bunches up under the stitch—it is recommended to use a specialized overcasting foot or maintain consistent tension throughout the sewing process.
- Preventing Fraying: Always stitch slightly inside the raw edge and then trim the excess, or use an overcasting foot to align the stitch perfectly with the edge.
- Structural Reinforcement: Use a zigzag stitch on high-stress areas like pocket corners or belt loops to distribute tension across a wider surface area.

Precision Crafting for Crew Necklines and Ribbed Collars
The neckline is the focal point of any upper-body garment. Achieving a flat, symmetrical, and durable crew neck requires a combination of precise measuring and specific handling of stretch materials. A common pitfall for beginners is a “wavy” neckline, which occurs when the ribbing is not stretched correctly or the seam allowance is inconsistent.
The Quartering Method for Even Distribution
To ensure the neckband fits the garment perfectly, professional sewists use the quartering method. This involves marking the center front, center back, and shoulder points of both the garment neckline and the circular neckband. By pinning these four points together, you can ensure that the stretch of the ribbing is distributed evenly around the circumference. When sewing, you must stretch only the neckband to match the length of the garment opening, never stretching the garment fabric itself.
Topstitching for a Professional Profile
Once the neckband is attached using a stretch stitch (like a narrow zigzag or a 4-thread overlock), topstitching is often applied to the garment side of the seam. This serves two purposes: it holds the seam allowance flat against the body for comfort and creates a crisp, professional silhouette. Using a twin needle or a coverstitch machine for this step adds a high-end retail appearance to your handmade t-shirts and sweatshirts.

Decorative Flourishes: Chain Stitch and Cross Stitch Applications
Beyond structural necessity, stitches can serve as powerful design elements. Decorative stitching adds personality and artistic value to items like denim jackets, tote bags, and children’s clothing. Two of the most versatile decorative techniques are the chain stitch and the cross stitch, both of which offer unique textures and visual impact.
The Chain Stitch: Adding Texture and Line Art
The chain stitch is a series of looped stitches that form a chain-like pattern on the surface of the fabric. In a manual or embroidery context, it is used to create thick, bold outlines and can even be used as a filling stitch when worked in close rows. Historically, the chain stitch was used for tambour embroidery and is still popular today for “western-style” chain stitch embroidery on vintage apparel. It provides a raised, three-dimensional texture that contrasts beautifully with flat-woven fabrics.
Practical Cross Stitching for Reinforcement
While often associated with counted-thread embroidery on Aida cloth, the cross stitch has practical applications in garment construction. It can be used to reinforce edges or create a “bar tack” effect in a more decorative manner. When applied to the edges of pockets or cuffs, the cross stitch provides multi-directional strength, preventing the fabric from tearing under lateral or vertical pressure. Additionally, it serves as a beautiful “folk” aesthetic detail when worked in contrasting thread colors.
| Stitch Type | Primary Use | Best Fabric Match |
|---|---|---|
| Chain Stitch | Decorative Outlining | Medium to Heavy Wovens |
| Cross Stitch | Reinforcement & Accent | Linen, Cotton, Canvas |
| Overlock | Edge Finishing | Knits and Fraying Wovens |

Invisible and Professional Finishes: Blind Stitches and Rolled Hems
High-end tailoring often prioritizes “invisibility”—the ability to secure a hem or a repair without the stitches being visible from the right side of the garment. This is achieved through specialized techniques like the blind stitch and the rolled hem, which are essential for formal wear, skirts, and delicate scarves.
The Blind Stitch Technique for Seamless Repairs
The blind stitch (or blind hem) works by catching only one or two threads of the face fabric while the rest of the stitch remains hidden within the fold of the hem. On a sewing machine, this requires a specific foot and a stitch pattern that performs several straight stitches followed by a single wide zigzag. Proper tension is crucial here; if the tension is too tight, the fabric will pucker at each “catch” point, making the stitch visible. Mastery of this technique is the core skill for seamless garment repair and professional pant hemming.
Hem Rolling for Delicate Fabrics
For lightweight fabrics like silk, chiffon, or organza, a standard folded hem is often too bulky. The rolled hem solves this by tightly rolling the edge of the fabric into a tiny cylinder and securing it with stitching. This can be done by hand for the most delicate finish or using a “narrow hemmer foot” on a machine. The result is a neat, minimal finish that allows the fabric to drape naturally without being weighed down by a heavy hemline. It is particularly effective for circular skirts and decorative ruffles.

Advanced Strategies for Stitch Durability and Aesthetics
To elevate your sewing from functional to exceptional, you must consider the interplay between thread weight, needle size, and machine settings. Even the most perfect stitch can fail if these variables are mismatched. For instance, using a heavy-duty thread with a fine needle will cause shredding, while a thick needle on silk will leave permanent holes.
Optimizing Machine Settings for Different Stitches
When switching between a zigzag stitch for edge finishing and a blind stitch for hemming, always perform a test scrap run. Adjust your pressure foot tension based on the fabric thickness. For thick layers, increasing the foot pressure ensures the feed dogs move the fabric consistently, preventing skipped stitches. Conversely, for delicate rolled hems, decreasing the pressure prevents the machine from stretching the fabric out of shape.
Thread Selection and Color Theory
For decorative stitches like the chain stitch, consider using topstitching thread or embroidery floss to make the texture pop. For structural stitches like the overlock, matching the thread color perfectly to the fabric is standard, but using a slightly darker shade can often hide the seam better than a lighter one. When working on multi-colored prints, choose the thread color that matches the background or the most dominant color in the pattern to maintain a cohesive look.
Frequently Asked Questions (FAQ)
- Q1: What is the main advantage of an overlock stitch over a standard zigzag?
- The overlock stitch is superior for knit fabrics because it is inherently stretchy and encases the entire edge, providing a much cleaner finish and better protection against fraying than a zigzag stitch. It also trims the fabric as it sews, ensuring a perfectly uniform seam allowance.
- Q2: How do I prevent my crew neckband from puckering?
- Puckering usually happens because the ribbing is not stretched enough or the garment fabric is being stretched along with it. Ensure you only stretch the neckband to fit the neckline opening, and use the quartering method to ensure the tension is even across the entire circumference.
- Q3: Can I do a blind stitch without a special sewing machine foot?
- While a blind hem foot makes the process much easier by providing a guide, you can do it with a standard foot by carefully folding the fabric and manually guiding the needle to just barely “kiss” the fold of the face fabric. However, for consistent results, a dedicated foot is highly recommended.
- Q4: Is the chain stitch strong enough for structural seams?
- A single chain stitch is generally not recommended for high-stress structural seams because if one loop breaks, the entire seam can unravel quickly. It is best used for decorative purposes or in combination with other stitches (like a safety stitch in industrial overlockers).
- Q5: What needle should I use for a rolled hem on silk?
- For delicate fabrics like silk, use a very fine Microtex or Sharp needle (size 60/8 or 70/10). These needles have a thin, acute point that pierces the fibers without snagging or creating large holes, which is essential for a clean rolled hem.