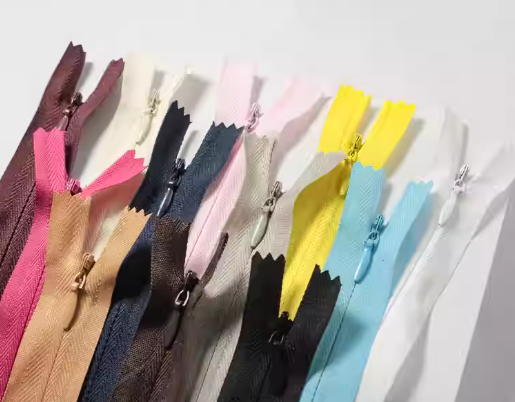
Creative sewing is an art form that transcends mere functionality, transforming fabric and thread into expressions of personal style and intricate craftsmanship. This comprehensive guide delves into three pivotal areas that can significantly elevate your sewing projects: the innovative use of zippers as decorative elements, the powerful combination of backstitch and chain stitch for rich, layered textures, and the precision required to sew perfect curves and spirals. By mastering these techniques, you will unlock new dimensions of design, allowing you to create pieces that are not only well-constructed but also visually captivating and uniquely yours.
Elevating Designs with Zipper Embellishments: Beyond Functionality
Zippers, traditionally seen as purely functional closures, possess immense potential as striking decorative elements. Moving beyond their primary role, incorporating zippers creatively can add an edgy, modern, or even elegant touch to garments, bags, and home decor items. The key lies in understanding how to expose, highlight, and integrate them into your design concept rather than simply concealing them.
Types of Decorative Zipper Applications
The versatility of zippers allows for numerous decorative applications. Each method offers a distinct aesthetic, enabling designers to choose the perfect approach to complement their vision.
- Exposed Zippers: This technique involves intentionally showing the zipper teeth and tape on the exterior of the garment or item. It’s popular in sportswear, jackets, and bags, often using contrasting colors or metallic finishes to draw attention. For instance, a long, chunky zipper running down the back of a dress can create a dramatic focal point.
- Appliquéd Zippers: Here, the zipper is sewn onto the surface of the fabric, often in a contrasting color or texture, to create a graphic design. This can be done in straight lines, geometric patterns, or even abstract shapes, making the zipper an integral part of the fabric’s surface design.
- Zipper Pockets & Panels: Instead of hiding the pocket opening, the zipper itself becomes a prominent feature of the pocket. Similarly, zippers can be used to create decorative panels or vents, adding both visual interest and practical adjustability. Consider a jacket with zippers running along the sleeves or side seams that can be opened for styling variations.
- Embellished Zipper Pulls: While not directly sewing the zipper, customizing the zipper pull with beads, charms, or fabric knots can significantly enhance its decorative appeal. This small detail can tie into the overall theme of your project.
Step-by-Step Guide to Integrating Zippers as Design Elements
Successfully transforming a zipper into a design highlight requires careful planning and execution. Follow these steps to achieve a professional and impactful result:
- Design Conception: Begin by sketching your design and clearly marking where the decorative zipper will be placed. Consider the zipper’s length, color, and teeth style (e.g., coil, metal, plastic molded) in relation to your fabric and desired aesthetic. A bold metal zipper might suit a leather jacket, while a delicate invisible zipper with contrasting tape could enhance a formal gown.
- Fabric Preparation: Stabilize the area where the zipper will be inserted or applied. For exposed zippers, fusing lightweight interfacing to the wrong side of the fabric along the seam line will prevent stretching and ensure a crisp finish.
- Placement Marking: Accurately mark the zipper’s placement on your fabric. Use tailor’s chalk or a fabric pen for precision. Ensure the markings are straight and even, especially for exposed applications.
- Sewing Technique:
- For exposed zippers, sew the zipper directly onto the seam allowance, ensuring the zipper teeth are visible and centered in the seam. Use a zipper foot for close, even stitching. A topstitch on both sides of the zipper will secure it and create a clean finish.
- For appliquéd zippers, position the zipper on the right side of the fabric according to your design. Pin securely and topstitch along both sides of the zipper tape, close to the teeth. You can also sew decorative stitches over the zipper tape for added texture.
- For zipper panels or vents, prepare separate fabric panels that will frame the zipper. Sew the zipper between these panels, ensuring the desired amount of zipper is exposed.
- Finishing Touches: Press the finished zipper area carefully. Trim any excess threads. For garments, ensure the lining is neatly attached around the zipper opening, if applicable, to maintain a clean interior finish.

The Dynamic Duo: Combining Backstitch and Chain Stitch for Texture
Embroidery offers an unparalleled opportunity to add texture, dimension, and intricate detail to any fabric. The backstitch and chain stitch, while fundamental, become incredibly powerful when combined, allowing for the creation of layered effects that are far richer than either stitch used in isolation. This combination is particularly effective for outlining, filling, and adding bold accents to embroidered designs.
Understanding the Backstitch: Precision and Outline
The backstitch is a foundational hand embroidery stitch known for its solid, continuous line. It’s often used for outlining designs, lettering, and creating fine details due to its neat and defined appearance. Its strength lies in its ability to create a sturdy, unbroken line, making it ideal for defining edges and intricate patterns.
- Execution: Bring the needle up from the back of the fabric, then insert it a short distance back along the line. Bring the needle up again a short distance ahead of the previous stitch, then insert it into the end of the previous stitch. This creates a continuous, even line.
- Key Characteristics: Produces a strong, solid line with no gaps. Excellent for text and detailed outlines.
Exploring the Chain Stitch: Bold Lines and Fill
The chain stitch, characterized by its series of interconnected loops, creates a textured, rope-like line. It’s a versatile stitch that can be used for bold outlines, filling areas, and adding a raised, decorative element. Its looped structure gives it a distinct visual appeal and allows for more volume than a simple backstitch.
- Execution: Bring the needle up, form a loop with the thread, and hold it with your thumb. Insert the needle back into the same hole or very close to it, then bring it up a short distance ahead, catching the loop under the needle. Pull the thread through to form a chain link.
- Key Characteristics: Creates a textured, raised line. Excellent for bold outlines, filling shapes, and decorative borders.
Advanced Techniques for Layered Effects
The true magic happens when backstitch and chain stitch are intentionally combined to build complex textures and visual depth. This approach allows for a hierarchical layering of detail, where one stitch provides structure and the other adds embellishment.
- Backstitch Foundation, Chain Stitch Embellishment: Use backstitch to create a precise outline for a motif (e.g., a leaf, a flower petal). Then, use chain stitch to fill the interior of the motif, following the backstitch outline. This creates a neat edge with a textured, slightly raised fill.
- Contrasting Textures for Borders: Create a border with a solid backstitch line. Immediately parallel to it, stitch another border using chain stitch. The contrast in texture will make both lines pop, adding a sophisticated detail to garments or textile art.
- Shadow and Highlight: For more dimensional effects, use backstitch for areas that should appear recessed or as shadows, and chain stitch for areas that need to stand out as highlights or have more volume. This is particularly effective in floral designs where petals can be outlined with backstitch and filled with chain stitch in a slightly lighter or darker shade.
- Combined Lettering: For embroidered text, use backstitch for the main structure of the letters, then add a decorative chain stitch over or alongside parts of the letters to give them a more ornate or hand-drawn feel.

Achieving Flawless Forms: Sewing Perfect Curves and Spirals
Sewing curves and spirals can be one of the most challenging yet rewarding aspects of garment construction and decorative sewing. While straight seams are relatively straightforward, curves demand precision, patience, and specific techniques to prevent puckering, stretching, or distorted shapes. Mastering these techniques is crucial for creating professional-looking necklines, armholes, curved seams on skirts, or intricate decorative patterns.
Essential Tools and Preparations for Curved Seams
Before you even begin to stitch, proper preparation and the right tools are paramount for successful curved sewing. Skimping on these steps often leads to frustration and imperfect results.
- Sharp Fabric Shears: A clean, precise cut along the curve is the first step. Dull scissors will snag and distort the fabric edge, making it harder to sew smoothly.
- Plenty of Pins or Clips: Use an ample number of pins or fabric clips to hold the curve securely. For tighter curves, pins should be placed closer together, perpendicular to the seam line.
- Matching Thread: While seemingly obvious, using thread that matches your fabric color can help camouflage any minor imperfections in your stitching.
- Appropriate Needle: Use a sharp, new needle suitable for your fabric type. A dull needle can pull threads and cause puckering.
- Slow and Steady Machine Speed: Resist the urge to rush. Sewing curves at a slower speed gives you more control and allows for minor adjustments as you go.
- Stay-stitching: For curves that are cut on the bias (like necklines or armholes), stay-stitching immediately after cutting is critical. This is a single line of stitching, usually within the seam allowance, that prevents the curve from stretching out of shape before you sew the main seam.
Techniques for Smooth Curves: Clipping, Notching, Stay-stitching
Once your curve is prepared, specific techniques during and after stitching ensure a smooth, professional finish. These methods counteract the fabric’s natural tendency to pucker or pull when sewn into a curve.
- Sewing the Curve:
- Short Stitch Length: Use a slightly shorter stitch length than you would for straight seams (e.g., 2.0-2.2mm). This provides more control and creates a smoother curve.
- Pivot and Adjust: As you sew, gently pivot the fabric around the needle. Keep your eye on the seam allowance, guiding the fabric rather than forcing it. Do not stretch the fabric as you sew.
- Use a Zipper Foot (Optional): For very tight curves or intricate details, a zipper foot can sometimes offer better visibility and maneuverability.
- Clipping Concave Curves: For inward curves (like a neckline or armhole), the seam allowance needs to be clipped. Make small, perpendicular cuts into the seam allowance, almost to the stitch line, but not through it. These clips allow the fabric to spread and lie flat when turned right side out.
- Notching Convex Curves: For outward curves (like a rounded collar or pocket flap), the seam allowance needs to be notched. Cut small V-shapes or triangles out of the seam allowance. This removes excess bulk, allowing the curve to lie smoothly without bunching.
- Pressing: Always press your curved seams thoroughly. For open seams, press them flat, then press them open over a tailor’s ham to maintain the curve’s shape. For seams pressed to one side, use the ham to gently shape the curve.

Mastering Spiral Patterns: From Simple to Complex
Sewing spirals introduces an additional layer of complexity to curved sewing, as you are continuously turning the fabric in a tightening or widening curve. These patterns are often found in quilting, appliqué, or decorative embellishments. Achieving a perfect spiral requires extreme control and a methodical approach.
- Drawing the Spiral: Begin by accurately drawing your spiral pattern onto the fabric. Use a compass or a flexible ruler to ensure smooth, even lines. For freehand spirals, practice drawing them repeatedly until you achieve the desired flow.
- Stay-stitching the Initial Curve: If the spiral begins with a tight curve or is on a bias, a light stay-stitch can help stabilize the fabric before the main seam.
- Slow and Steady: This cannot be overemphasized for spirals. Sew at a very slow speed, taking one or two stitches at a time, and constantly adjusting the fabric.
- Needle Down Position: Always stop with the needle in the down position when you need to adjust the fabric. This anchors your stitch and prevents the fabric from shifting.
- Gradual Pivoting: For spirals, your pivoting will be continuous and subtle. Gently guide the fabric around the needle, allowing the machine to feed the fabric evenly. Avoid pulling or pushing the fabric, which can distort the curve.
- Clipping/Notching for Spirals: Depending on whether the spiral is concave or convex at different points, you will need to apply clipping or notching to the seam allowances after stitching. For a continuous spiral, you might find yourself doing both along different segments. This is crucial for the spiral to lie flat.
- Pressing with a Tailor’s Ham: A tailor’s ham is invaluable for pressing spirals. It allows you to press the curved seam over a curved surface, helping the fabric to conform to its new shape without wrinkles or puckers.
By diligently applying these techniques, you can transform daunting curves and intricate spirals into beautifully executed design elements, adding a professional and polished touch to all your sewing endeavors.

Advanced Creative Sewing Strategies & Material Selection
Beyond mastering individual techniques, truly advanced creative sewing involves a holistic approach to design, material selection, and strategic planning. Integrating multiple embellishment methods and choosing the right fabrics are key to achieving cohesive and impactful results.
Integrating Mixed Media and Embellishments
Creative sewing doesn’t have to be limited to fabric and thread. Incorporating mixed media can add extraordinary depth and uniqueness to your projects. Think about how different elements can interact to tell a story or create a striking visual effect.
- Beading and Sequins: These can be sewn directly onto areas embellished with chain stitch or around decorative zippers to add sparkle and texture. For instance, tiny beads could highlight the loops of a chain stitch border, or sequins could be scattered around an exposed zipper.
- Fabric Paint or Markers: Use these to add color accents or fine details that complement your stitching or zipper designs. Imagine a hand-painted floral motif outlined with backstitch and filled with chain stitch.
- Ribbons and Trim: These can be integrated alongside decorative zippers or used to frame areas of intricate stitching. A grosgrain ribbon could run parallel to an exposed zipper, or delicate lace could frame a backstitch and chain stitch embroidered panel.
- Fringe and Tassels: Attach these to zipper pulls or along the edges of garments embellished with various stitches for a bohemian or playful touch.
- Heat Transfer Vinyl (HTV) or Appliqué: Combine these with embroidery for a multi-layered effect. An HTV design could be outlined with backstitch, or fabric appliqué pieces could be secured with decorative chain stitching.
When combining different media, always consider their compatibility in terms of weight, washability, and overall aesthetic. Test small samples first to ensure your chosen elements work harmoniously.
Fabric Choices for Different Sewing Techniques
The type of fabric you choose profoundly influences the success and appearance of your creative sewing projects. Different weaves and fiber contents react differently to stitches, zippers, and curved seams.
| Technique | Ideal Fabric Types | Considerations |
|---|---|---|
| Decorative Zippers | Denim, Canvas, Leather, Faux Leather, Heavy Cotton Twill, Gabardine | Needs stability to support zipper weight; contrasting textures enhance visual appeal. Avoid very thin or loosely woven fabrics unless heavily interfaced. |
| Backstitch & Chain Stitch | Linen, Cotton, Aida Cloth, Evenweave Fabrics, Felt, Stabilized Knit Fabrics | Medium-weight, stable fabrics with a clear weave allow stitches to show clearly. Avoid very stretchy knits without proper stabilization; fine silks can be challenging. |
| Perfect Curves & Spirals | Broadcloth, Poplin, Muslin, Quilting Cotton, Medium-weight Wovens, Stable Knits (with stay-stitching) | Fabrics with some body and a tight weave are easier to control. Very slippery fabrics (e.g., satin, chiffon) or extremely thick fabrics (e.g., heavy upholstery) present greater challenges. |
| General Creative Sewing | Cotton Blends, Linen Blends, Wool, Stable Synthetics | Look for fabrics that offer a good balance of stability, drape, and ease of handling. Consider the final use of the item for durability and care requirements. |
Always pre-wash and press your fabric before starting any project to prevent shrinkage and ensure accurate cutting and stitching. Using the correct needle size and type for your fabric is also non-negotiable for clean, professional results.
Maintenance and Care for Embellished Garments
Once you’ve poured your creativity into an embellished piece, proper care is essential to preserve its beauty and longevity. Different embellishments may require different care protocols.
- Check Component Care Labels: If using store-bought zippers or trims, check their individual care instructions.
- Hand Washing Preferred: For items with intricate embroidery, delicate beads, or exposed decorative zippers, hand washing in cool water with a mild detergent is often the safest option.
- Gentle Machine Wash: If machine washing is necessary, turn the item inside out, place it in a mesh laundry bag, and use a gentle cycle with cold water.
- Air Dry: Avoid tumble drying, especially for items with metal zippers or delicate stitching, as high heat can damage embellishments or cause shrinkage. Lay flat or hang to air dry.
- Ironing Precautions: Iron on the reverse side of embroidered areas or use a pressing cloth. Avoid direct heat on plastic zippers, sequins, or certain types of beads.
Frequently Asked Questions (FAQ)
- Q1: How can I ensure my decorative zipper lies perfectly flat without puckering?
- To ensure a flat decorative zipper, always stabilize the fabric area first with interfacing. Use a slightly longer stitch length for the initial seam, then a shorter stitch length for topstitching. Press thoroughly with steam, and consider edge-stitching both sides of the zipper tape very close to the teeth to secure it firmly.
- Q2: What’s the best way to practice combining backstitch and chain stitch for layered effects?
- Start with simple geometric shapes or outlines on a piece of scrap fabric. First, use backstitch to create the outer boundary. Then, practice filling the shape with chain stitch, paying attention to consistency. Experiment with different thread colors and thicknesses to see how they interact and create varying levels of dimension.
- Q3: My curved seams often end up wavy or stretched. What am I doing wrong?
- Wavy or stretched curves are typically due to stretching the fabric while sewing or not applying proper stay-stitching. Always stay-stitch curves cut on the bias immediately after cutting. Use a shorter stitch length, sew slowly, and guide the fabric gently without pulling. Ensure you’re clipping concave curves and notching convex curves correctly after stitching to release tension.
- Q4: Can I use decorative zippers on knit fabrics, and if so, how?
- Yes, you can use decorative zippers on knit fabrics, but stabilization is crucial. Fuse a strip of knit interfacing (fusible tricot) along the seam line where the zipper will be inserted. This will prevent the knit from stretching and distorting. You may also want to use a walking foot on your sewing machine to help feed the knit fabric evenly.
- Q5: What’s the biggest mistake beginners make when trying to sew spirals?
- The biggest mistake is rushing and not using the needle-down position frequently enough. Spirals require constant, subtle adjustments of the fabric. Beginners often try to sew too fast, leading to jagged lines or distorted shapes. Slow down, use a very short stitch length, and pivot the fabric with the needle down after every few stitches to maintain control and accuracy.