For beginners, home sewing machines often seem mysterious and complex. Buttons, knobs, settings, and stitch types can be overwhelming, and what confuses beginners most is how to adjust the stitches to produce both beautiful and durable fabric. In reality, stitch adjustment isn’t as difficult to understand as it seems. Once you grasp the core mechanisms of a home sewing machine, even beginners can quickly get started. The principles of stitch adjustment mainly involve the up-and-down movement of the needle, the coordination between the shuttle and the thread, and the synchronized operation of the fabric traction system. Understanding these basic principles will not only allow you to sew neat and even stitches but also prevent common problems such as fabric shifting, thread knots, or weak stitches. This article will systematically explain the core mechanisms of home sewing machine stitch adjustment from aspects such as stitch types, stitch length and width adjustment, tension control, and the fabric traction system, allowing beginners to easily understand the operating logic of a sewing machine.
Types of stitches and their formation mechanisms
The operating principle of straight stitch
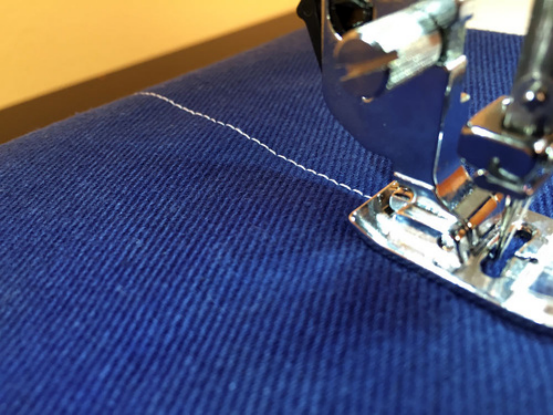
The straight stitch is the most common stitch used in household sewing machines and is suitable for most sewing projects. Its formation mechanism mainly relies on the coordinated vertical movement of the sewing machine needle and the lower bobbin. As the needle passes through the fabric, the bobbin catches the upper thread and forms a lockstitch. Then, the needle rises, and the fabric moves forward under the pressure of the presser foot, completing one stitch. Adjusting the stitch length essentially changes the distance the fabric travels with each stitch, while the needle speed and sewing machine settings affect the frequency of needle drops, thus affecting the stitch density. Understanding the working principle of the straight stitch is the first step for beginners to master a sewing machine, as almost all other complex stitches are derived from the straight stitch.
Working mechanism of serrated needle marks
The zigzag stitch is another commonly used stitch, primarily for sewing elastic fabrics or preventing fraying at the edges. Its formation mechanism is slightly more complex than the straight stitch. In addition to the up-and-down movement of the needle, the needle bar swings horizontally from side to side, creating a continuous “zigzag” shape. The width and length of the zig stitch can be adjusted using the sewing machine knob; a wider width allows for a wider range of needle bar movement, resulting in better fabric elasticity. For beginners, understanding the principle of the zig stitch’s left-right swing can help them avoid stretching the fabric or creating uneven stitches when sewing elastic fabrics.
The principle of decorative stitches
In addition to basic straight and zigzag stitches, modern home sewing machines support a variety of decorative stitches. Decorative stitches are typically achieved through complex horizontal movement of the needle bar, fine-tuning of fabric traction, and internal program control within the sewing machine. Although decorative stitches appear complex, their core principle still relies on the needle’s up-and-down movement and the bobbin’s locking mechanism, only adding lateral movement and special steps to create patterned effects. For beginners, understanding the basic mechanisms of straight and zigzag stitches will allow them to master decorative stitches more quickly.
Stitch length and width adjustment mechanism
Stitch length refers to the spacing between stitches. Shorter stitches result in denser stitches and a stronger seal; longer stitches result in sparser stitches, faster sewing speed, but reduced strength. Household sewing machines typically adjust stitch length via knobs or buttons, which essentially changes the distance the fabric advances with each stitch—the step distance the feed gear pushes the fabric forward. Beginners can test-sew to adjust the length, ensuring the stitches are both aesthetically pleasing and suit the fabric’s characteristics.
Stitch width adjustment is mainly used for zigzag and decorative stitches, achieved by changing the lateral swing of the needle bar. A wider stitch width results in a wider range of needle bar movement and a more pronounced sewing effect. When adjusting stitch width, it’s important to consider the fabric type and thickness; otherwise, excessively wide stitches may cause the fabric to stretch or wrinkle. Understanding the adjustment mechanisms for stitch length and width can help beginners choose appropriate settings when sewing different types of fabrics, improving sewing quality.
Tension control principle
Tension control in home sewing machines is crucial for ensuring even and strong stitches. The tension of the upper and lower threads needs to be coordinated; excessive upper thread tension can cause the fabric to sag, while insufficient lower thread tension can result in loose stitches. Tension control primarily relies on the sewing machine’s internal tension disc, springs, and bobbin system. Beginners can observe the stitches by test-sewing. If the upper thread is noticeably caught under the fabric, the tension is too high and needs to be loosened; if the lower thread is slack on the fabric surface, the tension needs to be increased. Understanding the principles of tension control not only helps produce even stitches but also reduces problems such as knots and skipped stitches.
Fabric traction system and presser foot function
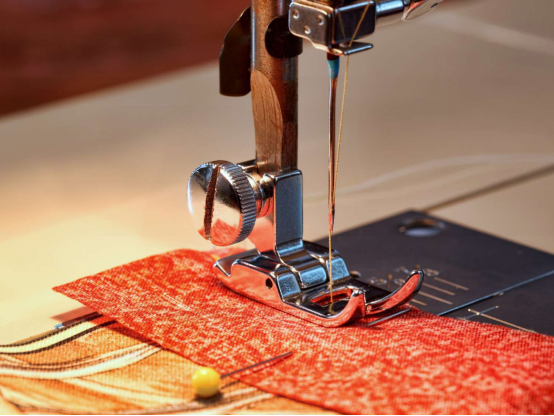
Neat stitches depend not only on the coordination of the needle and thread but also on the combined work of the fabric traction system and the presser foot. In a home sewing machine, the feed gear propels the fabric forward as the needle moves up and down; each needle drop is accompanied by fabric movement, creating continuous stitches. The presser foot applies pressure to the fabric, ensuring it doesn’t shift or deviate during sewing. For thick or multi-layered fabrics, the presser foot pressure is adjustable, allowing for smooth fabric feeding. Understanding the principles of fabric traction and the presser foot’s function can help beginners achieve better stitch results when sewing fabrics of varying thicknesses and materials.
Common Stitch Problems and Solutions
In actual sewing, problems such as loose stitches, skipped stitches, or fabric wrinkling may occur. Uneven stitches are often related to stitch length settings, thread tension, improper needle-shuttle coordination, or unbalanced fabric feed. Beginners can gradually solve stitch problems by checking tension settings, adjusting stitch length, and cleaning the shuttle and feed gear. Once the principles of stitch adjustment are understood, these problems will no longer be confusing.
Summary and Tips for Beginners
The stitch adjustment principle of a home sewing machine may seem complex, but its core mechanism is actually quite intuitive. The up-and-down movement of the needle, the coordination between the shuttle and the thread, the fabric traction system, and tension control are the core factors that constitute a stitch. Beginners can easily sew beautiful and neat stitches by understanding these principles and continuously adjusting the stitch length, width, and tension through trial sewing. After mastering these basics, you can freely use straight stitches, zigzag stitches, and various decorative stitches, improving your sewing skills and the quality of your work.
Understanding the principles of stitch adjustment is not only the first step in learning to sew but also key to improving the efficiency of using a sewing machine. Through practice, beginners can quickly master the operating logic of a sewing machine, thereby gaining more enjoyment and a sense of accomplishment in daily sewing, DIY projects, and handicrafts.