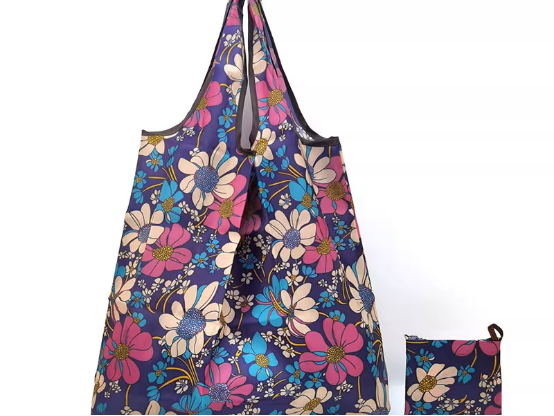
Welcome to the ultimate guide for crafting your own fabric bags, pouches, and holders. Creating custom accessories is a rewarding skill that allows for endless creativity, sustainability, and personal expression. Whether you are an absolute beginner looking for your first project or an experienced sewer seeking fresh inspiration, this comprehensive guide provides detailed, step-by-step instructions for a variety of practical and stylish items. We will walk you through making a simple card holder, a versatile drawstring bag, a secure wallet pouch, and a chic casual bag. By the end of this guide, you will have the confidence and knowledge to create beautiful, handmade items for yourself or as thoughtful gifts.
This guide breaks down each project into manageable steps, ensuring a smooth and enjoyable creative process. We will begin by covering the fundamental tools and materials you’ll need, then dive into four distinct tutorials, each building upon basic sewing techniques. Get ready to transform simple pieces of fabric into functional works of art.
Essential Tools and Materials for DIY Bag Making
Before embarking on your sewing projects, gathering the right tools and materials is crucial for a successful outcome. Having everything prepared and within reach will make the process more efficient and enjoyable. While specific projects may have unique requirements, the following list covers the foundational supplies for most small bag and pouch projects.
Core Sewing Supplies
These are the non-negotiable items for any sewing endeavor. Quality tools not only make the work easier but also contribute to a more professional-looking finished product.
- Sewing Machine: While some small projects can be hand-sewn, a sewing machine will provide stronger, more uniform stitches and significantly speed up the process.
- Fabric: Cotton is an excellent choice for beginners as it’s stable and easy to handle. Other options include canvas for sturdiness or linen for a natural look. You’ll typically need an outer fabric and a lining fabric.
- Thread: An all-purpose polyester thread that matches your fabric is a versatile choice.
- Scissors: It’s best to have two pairs: a sharp pair of fabric shears used exclusively for cutting fabric and a smaller pair of snips for trimming threads.
- Pins or Sewing Clips: These are essential for holding fabric pieces together accurately before and during sewing.
- Ruler and Measuring Tape: A clear acrylic ruler is perfect for measuring and cutting straight lines and precise pattern pieces.
- Fabric Marker or Chalk: Used for transferring pattern markings onto your fabric. These are designed to wash out or fade over time.
Project-Specific Materials
Depending on the bag you choose to make, you may need additional components to add structure and functionality. These materials provide reinforcement and professional finishing touches.
- Interfacing: A material fused or sewn to the wrong side of the fabric to add stiffness, body, and stability. It’s particularly important for wallets and structured bags to prevent them from being floppy.
- Zippers: A key component for secure pouches and wallets. Nylon zippers are generally easy for beginners to work with.
- Drawstring Cord: For drawstring bags, you’ll need a cord, ribbon, or fabric tube to cinch the bag closed.
- Iron and Ironing Board: Pressing your seams as you sew is a critical step for achieving crisp, professional results.

Project 1: Step-by-Step Guide to a Simple Card Holder
A simple card holder is the perfect first project for any sewing novice. It requires minimal fabric, involves straight-line sewing, and introduces fundamental construction techniques. This project is quick to complete and results in a highly practical item for organizing business cards, credit cards, or transit passes.
Materials and Cutting
For this project, you will need two coordinating pieces of cotton fabric (one for the exterior, one for the lining) and a small piece of fusible interfacing.
- Main Fabric (Exterior): Cut one piece measuring 11cm x 15cm.
- Lining Fabric: Cut one piece measuring 11cm x 15cm.
- Pocket Fabric (Lining): Cut one piece measuring 11cm x 13cm.
- Fusible Interfacing: Cut one piece measuring 11cm x 15cm.
Construction Process
Follow these steps carefully, pressing with an iron after each seam for the best results. A 1cm seam allowance is standard unless otherwise noted.
- Prepare the Pieces: Iron the fusible interfacing onto the wrong side of the main exterior fabric piece. Take the 11cm x 13cm pocket piece, fold it in half lengthwise with wrong sides together to create an 11cm x 6.5cm piece, and press.
- Assemble the Holder: Place the main lining piece (11cm x 15cm) right side up. Position the folded pocket piece on top, aligning the raw edges at the bottom. Then, place the main exterior piece on top of the stack, right side down. You should have a sandwich of fabrics with the pocket in the middle.
- Sew the Perimeter: Pin or clip all layers together. Sew around the entire perimeter, leaving a 4-5cm opening on one of the long sides for turning. Be sure to backstitch at the beginning and end of your seam to secure it.
- Trim and Turn: Trim the corners at a diagonal, being careful not to cut through your stitches. This reduces bulk for sharper corners. Carefully turn the entire card holder right side out through the opening you left. Use a dull, pointed object like a chopstick to gently push out the corners.
- Finishing: Press the card holder flat with an iron, making sure the raw edges of the opening are tucked in neatly. Topstitch very close to the edge (about 2-3mm) around the entire perimeter. This will close the opening and give the holder a clean, finished look.

Project 2: Crafting a Versatile Drawstring Pouch
A drawstring pouch is another excellent beginner project that is both functional and charming. It can be used for storing jewelry, organizing small items in a larger bag, or as a reusable gift bag. This tutorial guides you through creating a simple, unlined pouch.
Materials and Cutting
You will need a single piece of fabric and a cord or ribbon for the drawstring.
- Main Fabric: Cut one rectangle measuring 20cm x 40cm.
- Drawstring: Two pieces of cord or ribbon, each about 45-50cm long.
Construction Process
This project introduces the concept of creating a casing, a channel through which the drawstring is threaded.
- Finish the Top Edges: Lay your fabric rectangle flat. On both of the shorter (20cm) ends, fold the raw edge over by 0.5cm to the wrong side and press. Fold it over again by 1cm and press. Stitch along the bottom of this fold on both ends to create a neat hem.
- Create the Casing: Now, fold the hemmed top edges down towards the wrong side by 3cm and press. Stitch along the bottom edge of this fold, about 2.5cm from the top, to create the drawstring casing. Be sure to backstitch at the start and end. Repeat for the other side.
- Sew the Bag Body: Fold the fabric rectangle in half with right sides together, so the two casings at the top line up. Pin the side and bottom edges.
- Stitch the Seams: Sew down the side seam, starting your stitch just below the casing channel. Do not sew the casing closed! Continue sewing down the side and pivot to sew across the bottom. Backstitch at the start and end.
- Turn and Thread: Turn the bag right side out and press. Now, take one piece of your drawstring cord. Attach a safety pin to one end and thread it through one casing channel and all the way back through the other. Tie the two ends together. Take the second piece of cord and do the same, but starting from the opposite side. This creates the classic double-drawstring closure that cinches from both sides.

Project 3: Sewing a Practical DIY Wallet Pouch
This project takes your skills up a notch by incorporating a zipper. A zippered wallet pouch is perfect for coins, cash, or other small essentials. While zippers can seem intimidating, this method is straightforward and beginner-friendly.
Materials and Cutting
You’ll need outer fabric, lining fabric, interfacing for structure, and a zipper.
- Outer Fabric: Cut two pieces, 13cm x 22cm.
- Lining Fabric: Cut two pieces, 13cm x 22cm.
- Fusible Interfacing: Cut two pieces, 13cm x 22cm.
- Zipper: One nylon zipper, at least 25cm long.
Construction Process
The key to this project is assembling the layers in the correct order, which is often called the “zipper sandwich” method.
- Prepare Fabric: Iron the fusible interfacing to the wrong side of both outer fabric pieces.
- Attach the First Side of the Zipper: Lay one outer fabric piece right side up. Place the zipper on top, with the zipper teeth facing down, aligning the top edge of the zipper tape with the top raw edge of the fabric. Now, place one lining piece on top, right side down. You should have a sandwich: outer fabric (up), zipper (down), lining (down). Pin these three layers together.
- Sew the First Side: Using a zipper foot on your sewing machine, stitch as close to the zipper teeth as you can, sewing through all three layers.
- Attach the Second Side of the Zipper: Fold the fabrics back so the wrong sides are together and press them away from the zipper. Now, take your remaining outer fabric piece and place it right side up. Place the unsewn side of the zipper on top, teeth facing down. Finally, place the remaining lining piece on top, right side down. Pin and sew this second side just as you did the first.
- Assemble the Pouch Body: Open up your project. Fold it so the two outer fabric pieces are right sides together and the two lining pieces are right sides together, with the zipper in the middle. Make sure the zipper teeth are pointing towards the lining side. IMPORTANT: Open the zipper about halfway. This is crucial for turning the pouch later.
- Sew Around the Pouch: Pin the perimeter. Sew all the way around the pouch, but leave a 5-6cm opening in the bottom of the lining.
- Finishing: Trim the corners. Turn the entire pouch right side out through the opening in the lining and the half-open zipper. Poke out the corners. Stitch the opening in the lining closed, either by hand or with your machine. Push the lining inside the pouch and give it a final press.

Project 4: Creating a Reusable Fabric Casual Bag
A simple fabric tote or casual bag is an immensely practical project. It’s perfect for groceries, books, or everyday use. This tutorial outlines the creation of a basic, lined tote bag with sturdy fabric handles.
Materials and Cutting
Choose a durable fabric like canvas, denim, or heavy cotton for the exterior.
- Outer Fabric: Cut two pieces, 38cm x 42cm.
- Lining Fabric: Cut two pieces, 38cm x 42cm.
- Handle Fabric: Cut two pieces, 10cm x 50cm.
Construction Process
This project combines straight seams with the technique of creating and attaching handles.
- Create the Handles: Take one handle piece. Fold it in half lengthwise with wrong sides together and press. Open it up. Fold the long raw edges in to meet at the center crease you just made, and press. Fold it in half along the original center crease again, enclosing the raw edges. Topstitch along both long edges of the handle to create a strong, finished strap. Repeat for the second handle piece.
- Attach Handles to Outer Bag: Take one outer fabric piece and place it right side up. Measure and mark 8cm in from each side along the top edge. Pin one end of a handle at one mark, and the other end at the second mark, ensuring the handle is not twisted. The raw ends of the handle should align with the top raw edge of the bag piece. Baste the handles in place with a short stitch. Repeat for the second outer fabric piece and the second handle.
- Sew the Outer Bag: Place the two outer bag pieces right sides together, with the handles sandwiched in between. Pin along the sides and bottom. Sew the two sides and the bottom, leaving the top open.
- Sew the Lining: Place the two lining pieces right sides together. Pin and sew the two sides and the bottom, but this time, leave a 10-12cm opening in the bottom seam for turning later.
- Assemble the Bag: Turn the outer bag right side out. Keep the lining bag wrong side out. Place the outer bag (with handles) inside the lining bag. The right sides of the outer bag and the lining should be facing each other. Line up the side seams and the top raw edges. Pin all around the top edge.
- Finish the Top Seam: Sew all the way around the top edge of the bag, securing the lining to the outer bag.
- Turn and Close: Pull the outer bag out through the opening you left in the bottom of the lining. The entire bag is now inside out. Stitch the opening in the lining closed. Push the lining down into the outer bag. Press the top edge firmly and topstitch all the way around the top opening for a professional finish and added durability.

Advanced Tips and Customization Ideas
Once you have mastered the basic construction of these bags, you can begin to customize and enhance them. These modifications can add functionality, durability, and a unique personal touch to your creations. Experimenting with these techniques is a great way to grow your sewing skills.
Adding Pockets
Pockets can be easily added to most bag designs. For a simple patch pocket, cut a square or rectangle of fabric, hem the top edge, and then fold and press the other three edges. Topstitch it onto the lining or exterior of your bag before you sew the main seams. For a zippered pocket, you can adapt the wallet pouch technique on a smaller scale and insert it into the lining.
Boxing Corners for Depth
To give your tote bags or pouches a flat bottom and more internal space, you can “box” the corners. After sewing the side and bottom seams of your outer bag (or lining), pinch a bottom corner so the side seam and bottom seam line up, forming a triangle. Draw a line across this triangle, and sew along it. The further from the point you sew, the wider the base of your bag will be. Trim the excess fabric. Repeat for all four corners (two on the outer bag, two on the lining).
Exploring Different Materials
Don’t be afraid to experiment with different fabrics. For a sturdier bag, consider using canvas, denim, or corduroy. For a more luxurious feel, try velvet or faux leather. You can also mix and match fabrics, using a technique called color-blocking, or create a patchwork exterior for a truly unique look. Always consider the fabric’s weight and durability in relation to the bag’s intended use.
Decorative Embellishments
Personalize your creations with decorative touches. This can be done before you assemble the bag.
- Embroidery: Add a monogram, a small design, or a pattern with hand or machine embroidery.
- Appliqué: Cut shapes from felt or other fabrics and stitch them onto the exterior for a playful design.
- Hardware: Add magnetic snaps for closures, D-rings to attach keys, or rivets for a professional, durable finish on handles.
Frequently Asked Questions (FAQ)
- What is the best fabric for a beginner’s first bag project?
- For beginners, quilting cotton is the ideal choice. It is a medium-weight, stable fabric that doesn’t stretch or slip much, making it very easy to cut and sew. It’s also available in a vast array of colors and patterns, is affordable, and presses beautifully, which helps in creating crisp seams and a professional finish.
- Do I absolutely need a sewing machine to make these bags?
- While a sewing machine is highly recommended for speed and stitch durability, you can certainly make all of these projects by hand. For hand sewing, use a strong backstitch for the main construction seams, as it closely mimics the strength of a machine stitch. It will be more time-consuming, but it is a great way to learn about sewing construction without investing in a machine right away.
- How do I properly install a zipper in a wallet pouch?
- The key is the “zipper sandwich” method. Layer your fabrics in this order: outer fabric (right side up), zipper (teeth down), and lining fabric (right side down). Align the top edges. Using a zipper foot on your machine allows you to stitch very close to the teeth. After sewing one side, press the fabrics away from the zipper and repeat the exact same process for the other side with the remaining fabric pieces. Always remember to half-open the zipper before sewing the pouch’s perimeter.
- What is interfacing and why is it important for bags?
- Interfacing is a separate material that is applied to the wrong side of your main fabric to add structure, body, and stability. For bags and wallets, it prevents the final product from being limp and floppy. There are many types, including fusible (iron-on) and sew-in, and they come in various weights from light to heavy. Using the right interfacing gives your bag a professional, high-quality feel and helps it hold its shape.
- How can I make my DIY bags more durable?
- To increase durability, consider a few techniques. Use a strong, durable fabric like canvas or denim for the exterior. Reinforce the points where handles attach to the bag by sewing a small ‘X’ in a box shape. Always backstitch at the beginning and end of every seam. Using a smaller stitch length can also create a stronger seam. Finally, topstitching around the top edge of a tote bag not only looks nice but also adds an extra layer of strength to the main opening.