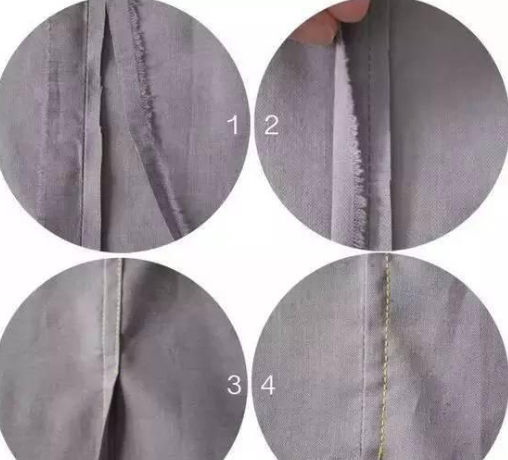
Achieving a professional, high-quality finish in any sewing project hinges on one critical skill: mastering the edges. The way a seam lies, a corner turns, or a curve flows is the true hallmark of craftsmanship. It’s the difference between a garment that looks homemade and one that looks bespoke. This guide will take you beyond simple stitching to explore the foundational techniques of pressing, clipping, and notching. We will delve into the “why” behind each action, ensuring you understand how to make fabric behave exactly as you command, resulting in crisp lines, smooth curves, and a flawless final product.
The Foundation of Flawless Edges: Why Pressing Matters
Many beginners underestimate the power of an iron, viewing it as a final step rather than an integral part of the construction process. However, pressing is a transformative technique. It’s not the same as ironing; pressing is the precise, up-and-down application of heat and steam to a specific area, while ironing involves sliding the iron across the fabric.
The Science of “Setting the Seam”
Before pressing a seam open or to one side, you should first press the seam flat as it was sewn. This is called “setting the seam.” This crucial step melds the stitches into the fabric fibers, relaxing them and making the subsequent pressing much flatter and crisper. It locks the thread in place, improving the durability and appearance of the seam.
Pressing vs. Ironing: A Critical Distinction
Using a sliding, back-and-forth ironing motion during construction can easily stretch and distort your fabric pieces, especially on bias or curved edges. This can ruin the fit and drape of your garment. Pressing, with its gentle up-and-down motion, reshapes the fabric exactly where needed without introducing unwanted stretch, preserving the integrity of your pattern pieces.

Essential Tools for Professional Edge Finishing
While a basic iron is a start, a few specialized tools can elevate your edge finishing from good to exceptional. Investing in the right equipment makes the process easier and yields far superior results.
The Steam Iron and Pressing Cloth
A quality steam iron is non-negotiable. The steam helps to relax fabric fibers, making them more pliable. A pressing cloth—a piece of scrap fabric, often cotton muslin or silk organza—acts as a protective barrier between your iron and your project fabric. It prevents scorching, melting of synthetic fibers, and unwanted shine on delicate materials like wool or satin.
Tailor’s Ham and Seam Roll
These are the secret weapons for professional-looking curves.
-
Tailor’s Ham:
A firmly stuffed, ham-shaped cushion used for pressing curved areas like darts, collars, and sleeve caps. Its shape mimics the curves of the human body, allowing you to press the seam without flattening the surrounding area. -
Seam Roll:
A long, cylindrical cushion used for pressing long seams open without the seam allowance impression showing through on the right side of the fabric. It’s perfect for sleeves and pant legs.

Conquering Curves: Inside and Outside Edges
Curved seams are often intimidating, but they follow simple geometric principles. To make a curved edge lie flat when turned, you must either add space or remove bulk from the seam allowance.
The Art of Clipping Inside Curves
An inside curve, like a neckline or an armhole, needs to spread open when turned right side out. The seam allowance is shorter than the seam line itself. To allow it to spread without pulling or puckering, you must clip into the seam allowance.
-
Technique:
Using the tip of a sharp pair of scissors, make small, straight cuts into the seam allowance, perpendicular to the stitch line. -
Pro Tip:
Clip as close to the stitching as you dare without cutting through it. The sharper the curve, the closer your clips should be to one another.
The Science of Notching Outside Curves
An outside curve, like a rounded collar or a scalloped hem, has excess fabric in the seam allowance when turned. The seam allowance is longer than the seam line. This bulk must be removed to prevent lumps.
-
Technique:
Cut small V-shaped wedges, or “notches,” out of the seam allowance. This removes the excess fabric. -
Pro Tip:
Be careful not to cut your notches too wide, as this can create a jagged edge. For very tight curves, you can trim the seam allowance very narrow (e.g., 1/4 inch) instead of or in addition to notching.
Fabric-Specific Pressing Strategies
Not all fabrics are created equal. Using the wrong heat or technique can ruin your project. This table provides a quick reference for pressing common fabric types.
| Fabric Type | Iron Temperature | Steam Usage | Special Considerations |
|---|---|---|---|
|
Cotton & Linen |
High | High Steam | Can withstand high heat. Press while slightly damp for best results. |
|
Wool |
Medium | High Steam | Always use a pressing cloth to prevent shine. Avoid over-pressing. |
|
Silk |
Low to Medium | Low/No Steam | Use a dry iron and a pressing cloth. Steam can cause water spots. |
|
Polyester & Synthetics |
Low | Low/No Steam | Very sensitive to heat; can melt easily. Always test on a scrap first. |
Frequently Asked Questions (FAQ)
-
What is the difference between clipping and notching?
- Clipping involves making straight cuts into the seam allowance of an inside curve (like a neckline) to help it spread and lie flat. Notching involves cutting V-shaped wedges out of the seam allowance of an outside curve (like a collar) to remove bulk and prevent lumps.
-
Why do my seams pucker after I press them?
- Puckering can be caused by several factors. You might be using an ironing motion instead of a pressing motion, which stretches the fabric. Alternatively, your thread tension may have been too tight during sewing, or you may not have “set the seam” by pressing it flat before pressing it open.
-
How often should I press when sewing a garment?
- The golden rule is to “press as you go.” You should press every single seam you sew before you cross it with another seam. This ensures maximum accuracy and a clean, professional finish that is impossible to achieve if you wait to press everything at the end.
-
What is “grading a seam” and why is it important for edges?
- Grading a seam means trimming the layers of the seam allowance to different widths. This is typically done on enclosed seams like collars, cuffs, and facings. By reducing the bulk in steps, you create a smooth, gradual edge without a noticeable ridge from the seam allowance showing on the right side.
-
Can I get good results without a tailor’s ham?
- While a tailor’s ham provides the best results for curved areas, you can create a temporary substitute by tightly rolling a towel. It won’t be as firm or perfectly shaped, but it can provide some support and is better than pressing a 3D curve on a flat ironing board.