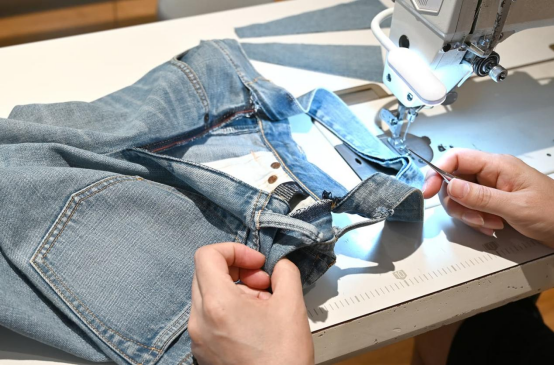
In an era dominated by fast fashion and disposable goods, the resurgence of sewing and mending represents more than just a hobby; it is a profound shift toward sustainability, mindfulness, and the preservation of personal history. Whether you are looking to repair a beloved heirloom passed down through generations or embarking on your very first project to create functional items for your home, mastering the needle and thread offers a unique sense of accomplishment. This guide synthesizes the delicate art of garment preservation with the structured world of beginner-friendly construction, providing you with the technical knowledge required to navigate the entire lifecycle of a textile.
The Philosophy of Mending: Preserving Heritage and Reducing Waste
Mending is often viewed as a chore, yet it is fundamentally an act of care. By repairing a garment, we acknowledge the labor, resources, and memories embedded within the fabric. This practice, often inherited from previous generations who lived by the “make do and mend” ethos, allows us to challenge the modern culture of waste. When we mend, we are not just fixing a hole; we are extending the narrative of the item, making it stronger and more personal than it was when it left the factory.
The Emotional Connection to Textiles
Clothing often carries the weight of memory—the sweater worn during a significant life event or the quilt handmade by a grandmother. These items are irreplaceable. Learning to mend allows these stories to continue. Instead of discarding a piece of clothing due to a minor tear or worn-out elbow, mending transforms the flaw into a feature. This approach aligns with the Japanese concept of Kintsugi, where repairs are made visible and celebrated, highlighting the history of the object rather than hiding its imperfections.
Environmental Impact of Fabric Repair
The textile industry is one of the largest polluters globally. By extending the life of your clothes by just nine months, you can reduce their carbon, water, and waste footprints by approximately 20-30%. Mending is a direct action against the “take-make-dispose” model. It empowers individuals to take control of their consumption habits, fostering a deeper appreciation for the materials we often take for granted.

Essential Tools for the Modern Sewist and Mender
To achieve professional and durable results, one must start with the correct tools. While a basic sewing kit is a start, specific tasks require specialized equipment to ensure the integrity of the fabric is maintained during the repair or construction process.
Foundational Hand-Sewing Equipment
- Needle Assortment: You will need various sizes, including sharps for general sewing, betweens for detailed work, and tapestry needles for darning knits.
- High-Quality Thread: Opt for cotton or silk threads for natural fibers and polyester for synthetics or items requiring extra strength. Matching the thread weight to the fabric weight is crucial for a seamless finish.
- Thimbles: Essential for protecting your fingers when pushing needles through heavy fabrics like denim or canvas.
- Small Embroidery Scissors: These provide the precision needed for snipping threads and trimming small patches without damaging the surrounding area.
Advanced Tools for Construction and Repair
When moving from simple repairs to creating new items like napkins, additional tools become necessary. A rotary cutter and mat ensure perfectly straight edges, which are vital for home linens. A seam ripper is perhaps the most important tool for any beginner, allowing for the correction of mistakes without tearing the base material. Furthermore, a tailor’s chalk or fabric marker allows for precise measurements that disappear after washing or ironing.

Master Techniques for Invisible and Visible Mending
Depending on the garment and the nature of the damage, you may choose between making the repair disappear or making it a decorative element. Both require a solid understanding of fabric structure.
Darning: The Art of Reweaving
Darning is the preferred method for fixing holes in knitwear, such as socks or sweaters. It involves creating a “weave” of thread over the hole. You start by anchoring the thread in the healthy fabric around the hole, then running parallel lines across the gap. Once the vertical “warp” threads are in place, you weave the “weft” threads over and under them. This creates a new patch of fabric that is integrated directly into the original garment. For a subtle look, use a matching yarn; for a bold, modern look, use a contrasting color.
Patching: Reinforcing High-Wear Areas
Patching is ideal for structural repairs on woven fabrics like jeans or work shirts. Under-patching involves placing a piece of fabric behind the hole and stitching around the edges to secure it, which provides a clean, recessed look. Over-patching puts the new fabric on top, which can be used to add a decorative element or extra durability to knees and elbows. Using a running stitch or a blanket stitch around the edges of the patch ensures it stays in place through repeated washings.

Transitioning to Creation: Why Start with Cloth Napkins
Once you have mastered the basics of handling a needle and understanding fabric behavior through mending, the next logical step is construction. Cloth napkins are the gold standard for beginner sewing projects because they focus on the most fundamental skill in sewing: the straight line.
The Benefits of DIY Home Linens
Creating your own napkins allows for complete customization of your dining experience. You can select fabrics that match your decor, choose specific dimensions (such as oversized dinner napkins or smaller cocktail napkins), and ensure the quality of the material. Beyond aesthetics, switching from paper to cloth napkins is a significant step in reducing household waste, making this project both practical and environmentally friendly.
Fabric Selection for Durability
| Fabric Type | Pros | Cons |
|---|---|---|
| Linen | Highly absorbent, becomes softer with age, elegant texture. | Prone to wrinkling, more expensive. |
| Cotton (Quilting Weight) | Easy to handle, wide variety of prints, affordable. | Can be thin; may require double layering for formal use. |
| Cotton-Linen Blend | Best of both worlds; durable and less prone to wrinkles. | Can be harder to find in specific patterns. |

Preparing Your Fabric: Measuring, Cutting, and Pressing
Success in sewing is 90% preparation and 10% actual stitching. Skipping the preparation phases often leads to puckered seams, uneven corners, and projects that don’t survive the first wash.
Pre-Washing and Shrinking
Natural fibers like cotton and linen will shrink when first laundered. It is imperative to wash and dry your fabric using the same settings you plan to use for the finished napkins before you ever touch it with scissors. If you skip this step, your perfectly square napkins may become distorted rectangles after their first trip through the laundry.
The Power of the Iron
In the world of professional sewing, the iron is just as important as the sewing machine. Pressing (lifting the iron and placing it down) rather than ironing (sliding the iron) prevents the fabric from stretching out of shape. For napkins, pressing your hems before you sew them creates a crisp guide that makes the actual stitching significantly easier and more accurate.

Step-by-Step Guide to Sewing Your First Table Napkin
Follow these steps to create a professional-looking set of napkins. We will use a standard 18×18 inch finished size as our target, which requires a 19×19 inch starting square to account for hems.
Step 1: Measuring and Cutting
Using a quilting ruler and a rotary cutter, cut your pre-washed fabric into 19-inch squares. Ensure your cuts are exactly on the grain of the fabric to prevent the napkin from twisting. If you don’t have a rotary cutter, mark your lines with fabric chalk and use sharp fabric shears, taking care to keep the fabric flat on the table while cutting.
Step 2: Creating the Double-Fold Hem
Place your fabric wrong-side up. Fold one edge over by 1/4 inch and press with a hot iron. Fold that same edge over again by another 1/4 inch and press again. This hides the raw edge of the fabric inside the fold, preventing fraying. Repeat this for all four sides. For beginners, using sewing pins or wonder clips to hold these folds in place is highly recommended.
Step 3: Stitching the Hems
Starting in the middle of one side, stitch close to the inner folded edge. When you reach a corner, stop with the needle down in the fabric, lift the presser foot, pivot the fabric 90 degrees, lower the presser foot, and continue. This ensures a continuous, strong line of stitching around the entire perimeter. Always backstitch at the beginning and end of your seam to lock the threads.

Advanced Tips for Professional Edge Finishing
Once you are comfortable with the basic double-fold hem, you can elevate your work with more advanced techniques that provide a “high-end” boutique finish.
Mitered Corners
A mitered corner eliminates the bulk where the two hems overlap at the corner, creating a sharp, 45-degree diagonal seam. This is achieved by folding the corner inward at a 45-degree angle before completing the side folds. While it requires more precision in pressing, it results in a much flatter and more professional-looking napkin that lies perfectly on the table.
Decorative Topstitching
Instead of a standard straight stitch, consider using a decorative stitch if your machine offers them. A zigzag stitch or a blanket stitch in a contrasting thread color can turn a simple linen napkin into a piece of art. Additionally, using a slightly longer stitch length (3.0mm to 3.5mm) for topstitching often provides a more sophisticated, hand-finished appearance.

Troubleshooting Common Sewing and Mending Issues
Even experienced sewists encounter challenges. Understanding how to diagnose and fix these issues is key to maintaining your momentum and ensuring the quality of your projects.
Thread Bunching (Bird’s Nesting)
If you see a mass of tangled thread on the underside of your fabric, it is usually caused by incorrect threading of the upper machine tension or the bobbin. Re-thread your machine completely, ensuring the presser foot is up while threading the top, as this opens the tension disks to allow the thread to seat properly.
Fabric Puckering
Puckering occurs when the tension is too tight or the needle is dull. If your mended patch or napkin hem looks gathered, try loosening the upper tension slightly and always start a new project with a fresh needle. For very thin fabrics, placing a piece of tissue paper underneath while sewing can provide the stability needed to prevent the machine from “eating” the fabric.
Frequently Asked Questions (FAQ)
- Q1: Can I mend a hole that is too large for darning?
- Yes. For holes larger than a quarter, darning may become unstable. In these cases, patching is the superior method. You can use an “under-patch” to reinforce the area and then perform light darning over the top to secure the frayed edges of the original hole to the new fabric.
- Q2: What is the best fabric for a beginner’s first napkin project?
- 100% cotton quilting fabric is the best choice. It is stable, doesn’t slip under the presser foot, takes a crease from an iron very well, and is available in endless patterns. Avoid “slippery” fabrics like polyester satin or very thick fabrics like heavy canvas for your first attempt.
- Q3: Do I really need to pre-wash my fabric?
- Absolutely. Most natural fibers shrink significantly. If you sew your napkins first and then wash them, the thread (which usually doesn’t shrink) will cause the shrunken fabric to pucker along the seams, ruining the flat, crisp look of your work.
- Q4: How do I choose the right needle size for mending?
- The needle should be appropriate for the weight of the fabric, not the size of the hole. For delicate silks or thin cotton, use a fine needle (size 60/8 or 70/10). For denim or heavy linens, use a thicker needle (size 90/14 or 100/16) to prevent the needle from bending or breaking.
- Q5: My mending stitches are visible; how can I make them look better?
- If you cannot hide the stitches, embrace “Visible Mending.” Use a contrasting thread color and create a pattern, like a cross-stitch or a sashiko-style running stitch. By making the repair look intentional, it becomes a decorative element rather than a flaw.